Guide to Using the Google Tag Manager Clean-Up Tool
At MeasureMinds we have developed a Google Tag Manager clean-up tool. Today we’re finally announcing its existence. So what exactly is it? And what does it exactly do?
P.S feel free to use this guide to using our tool as a guide to performing a Google Tag Manager clean-up manually too. We will be going through all the processes that our tool performs automatically so use this guide as you will.
Below is a little explainer video:
If you’d like to quickly go over how to use the tool then you can watch our tutorial video here:
What is the Google Tag Manager Clean-Up tool?
Our GTM clean-up tool is a piece of software designed to, you guessed it, clean up your GTM accounts. But what exactly does that mean?
MeasureMinds, as a Google Tag Manager agency, always initiates a ‘clean-up’ process when we first go through our client’s GTM accounts. In which, we will go through all tags, triggers, and variables and make sure that they all have a uniform naming protocol. In addition, we also:
- Create folders to mark anything for deletion or review
- Optionally delete paused tags, unused triggers, and unused variables
- Rename variables, tags, and triggers
- Create folders for user-defined built-in variables: Built-in variables
- Create user-defined built-in variables
- Change references from built-in variables to user-defined variables
- Delete built-in variables
- Set oncePerLoad for each tag (based by option)
- Change gtm.click tags V1 -> V2
- Change gtm.linkClick tags V1 -> V2
- Create GAS variable if it doesn’t already exist
- Update UA tags:
- update fields to set from true, false to variables
- if label or value empty set {{undefined}}, 0
- if no gas set {{00 – Google Analytics Settings}} and overrideGaSettings to false
Things to consider before using the tool
Creating a new workspace
The Google Tag Manager Clean-Up tool will create a new workspace for you in your Google Tag Manager. We added this feature so that you keep your original workspace just in case that you don’t like the final result. The only issue here is that Google Tag Manager has a limit on the number of workspaces you can have at one time. That limit being 3.
Therefore, before you use our tool, make sure that you have, at most, 2 workspaces in your Google Tag Manager container. Otherwise, it won’t work. But don’t worry, nothing would get deleted!
Google Tag Manager Requests
GTM will only allow for 15 requests per minute which means that when using the tool, the process may take a few minutes. This is still FAR quicker than doing a GTM clean-up manually, however, you can talk to Google and ask for an increase in the number of requests per minute. We managed to get 60 requests per minute, which should mean the tool is 4 times as fast! We recommend everybody asking for this.
How your data is stored
At MeasureMinds, we understand how valuable and precious your data is for you and why it’s important to know what happens to it. That’s why we have created a privacy policy for the GTM Clean-Up tool which you should read before using it.
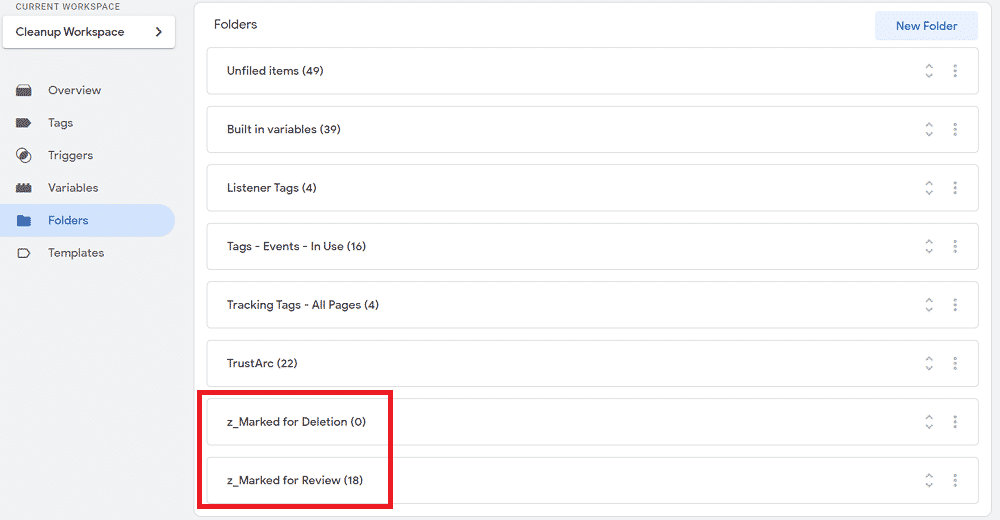
Create folders to mark anything for deletion or review
The first step of the process is to create folders to mark anything for deletion or review. Our tool will create the folders for you to use at a later date. Here you can put anything that you think should be deleted into ‘z_Marked for Deletion’ and put anything to be reviewed into ‘z_Marked for Review’.
It’s a small thing but does help you keep things organized. It allows you to flag up anything with other members of your team and provides a centralized place for items that need to be reviewed.
Next, our tool will go through your tags, triggers and variables and delete any unused items. A tidy house is a tidy mind… In order for your to monitor and sort through your GTM container, you should always get rid of any rubbish! Our Google Tag Manager clean-up tool can do all the heavy lifting, leaving you with a nice clean house.
It should be noted that all unused items will be automatically deleted by the tool rather than be added to the ‘z_Marked for Deletion’ folder. That folder is solely made for manual use. But that’s why the tool creates a new workspace; if you don’t like the result, you can revert back quickly.
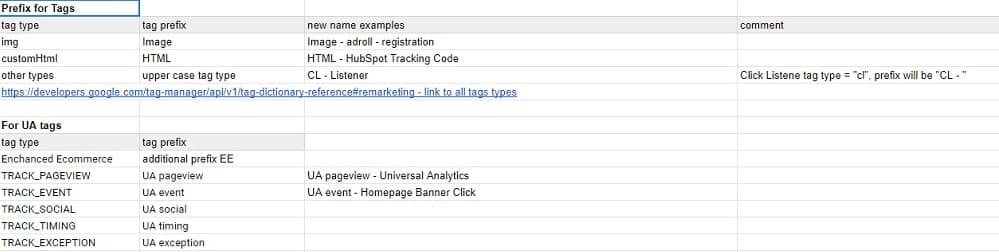
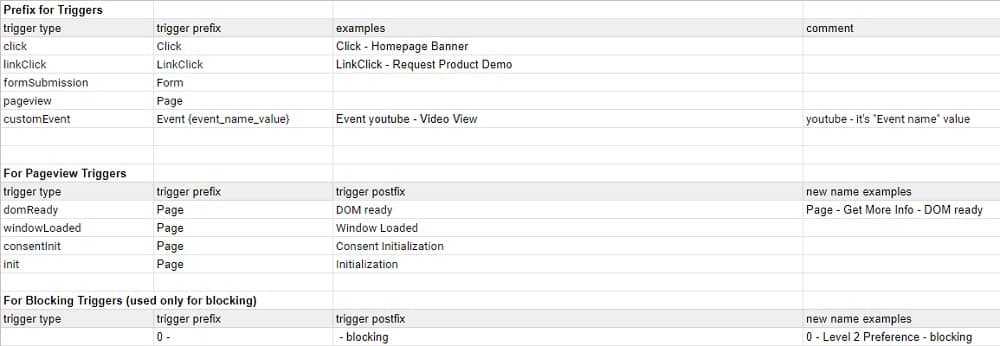
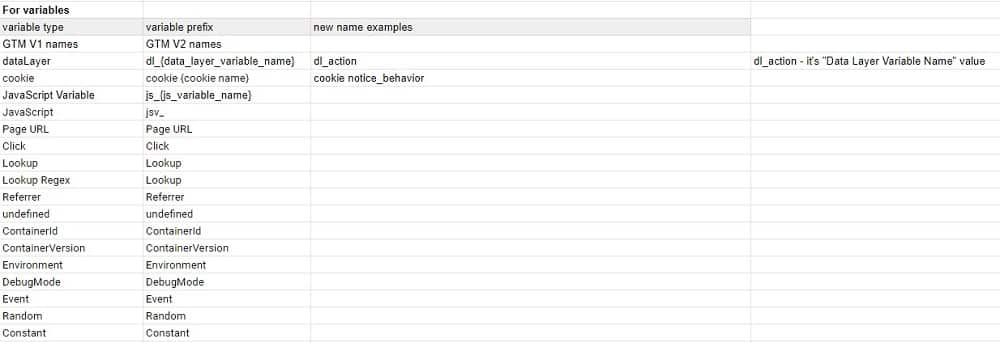
An important part of a GTM cleanup is to give a uniform naming protocol to your container. This helps you quickly locate items or groups of items within the container. Here are the renaming rules we use with examples:
Create folders for user-defined built-in variables: Built-in variables
The next 4 steps in the process essentially convert built-in variables into user-defined variables. The benefit of doing this is that built-in variables can’t be changed, but user-defined variables can. You can set component type, URL source, and more importantly, you can set how to convert undefined values or change to lowercase. Here’s an example of that difference:
Built-in variable
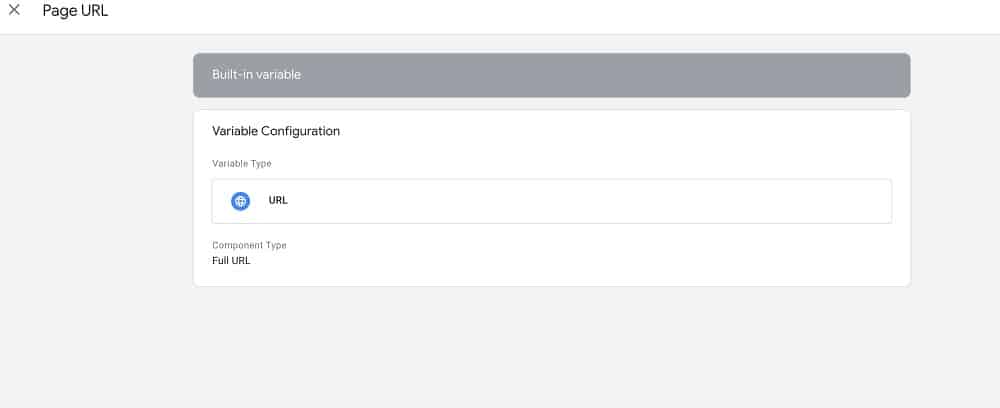
User-defined variable
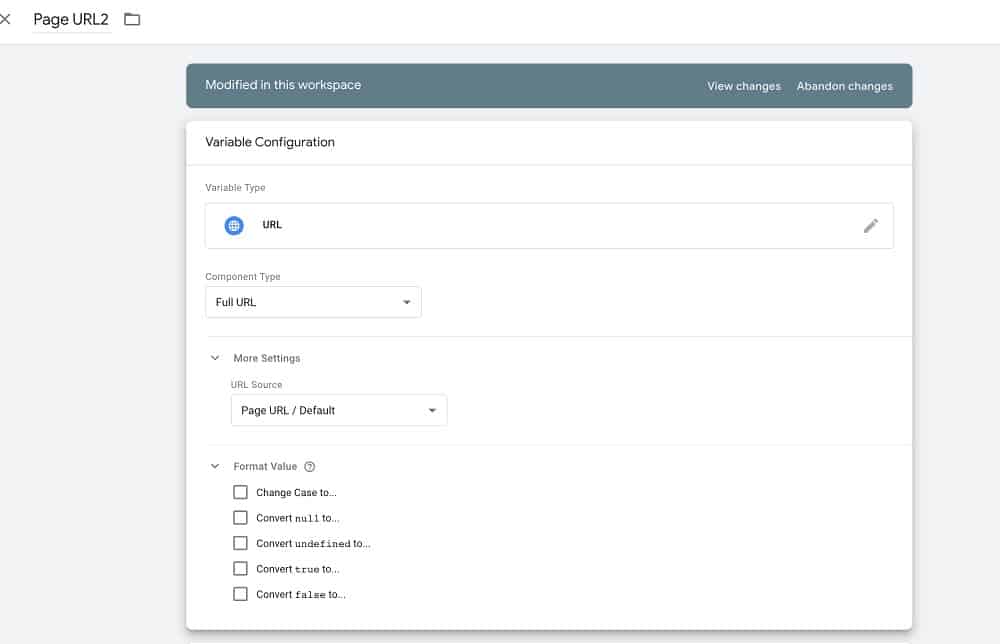
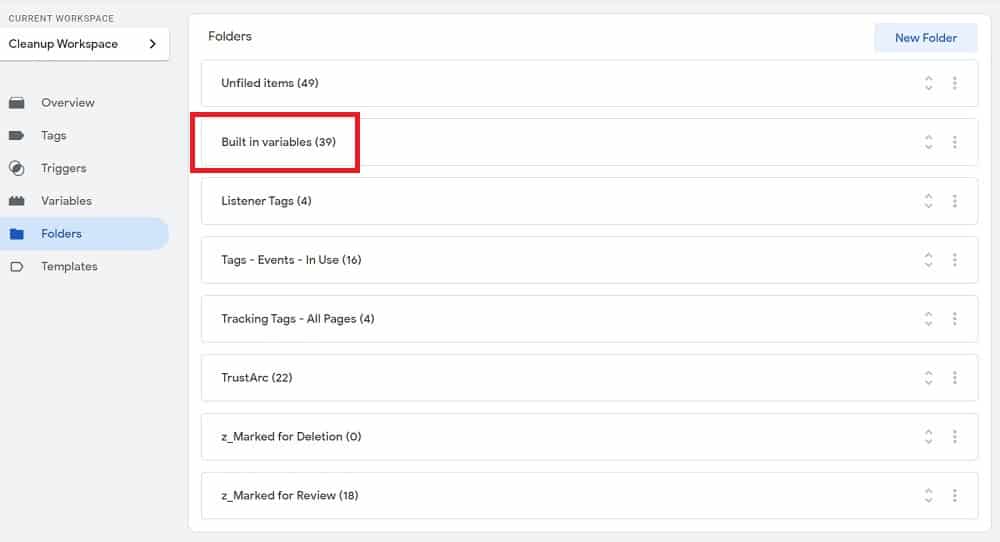
Notice how the user-defined variable has many more options for customization? That’s what we’re after! Below you’ll see an image with the folder created for all the built-in variables in your GTM container.
Create user-defined built-in variables
Before deleting the built-in variables, the tool will create user-defined variables.
Change references from built-in variables to user-defined variables
Then the tool will change any reference to built-in variables within your triggers and tags to reference the newly created user-defined variables. This essentially finishes the swap out for built-in variables to user-defined variables.
Delete built-in variables
Finally, after the conversion to user-defined variables, the tool will delete the built-in variables. They have no use now, so get rid!
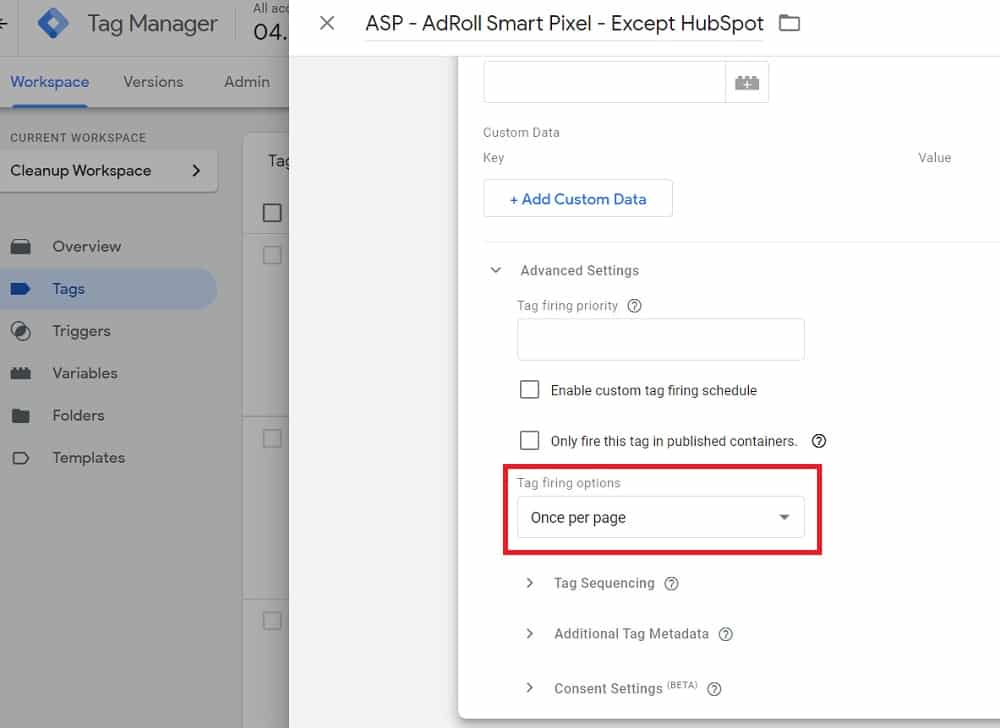
Set oncePerLoad for each tag (based on option)
Next, the Google Tag Manager clean-up tool will set each tag’s firing options to ‘once per page’. We do this so that our tags don’t fire more than once on the same page and thus do not send through too much data.
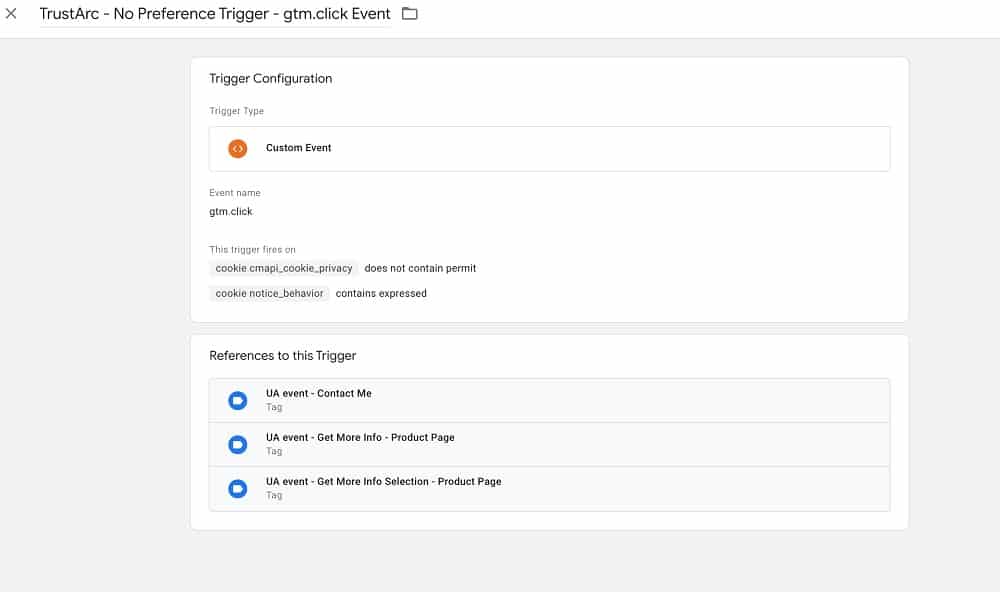
That’s a subheading that may make you want to throw up, but it’s actually a relatively simple part of the process. All that the google tag manager clean-up tool is doing here is changing trigger types. Below you’ll see that the trigger type was a custom event named “gtm.click”.
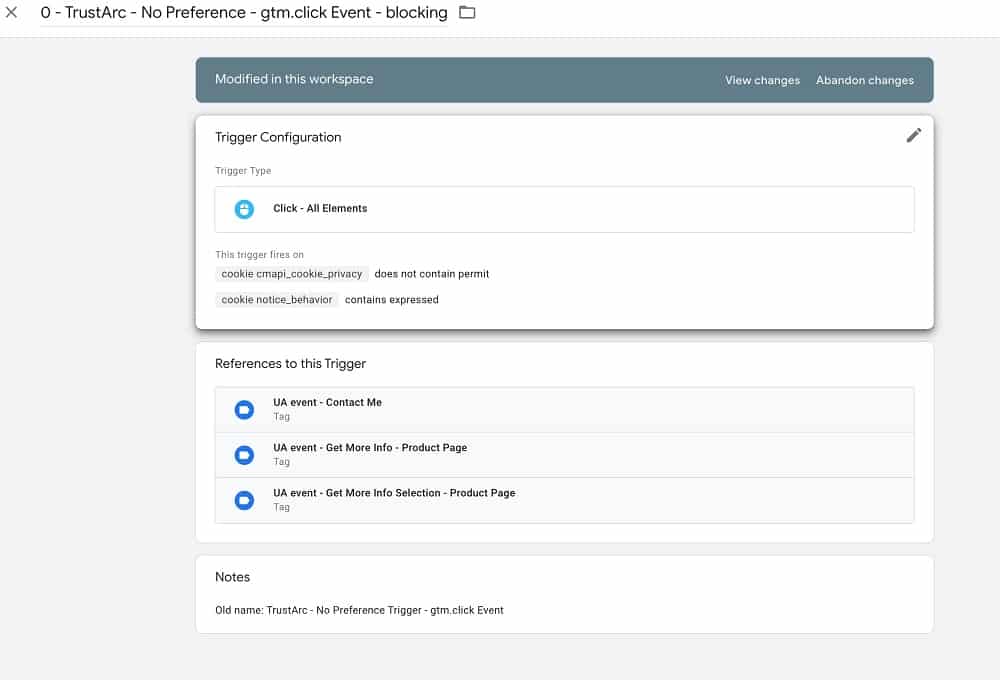
After you’ll see that the trigger type has been set to “click – all elements”.
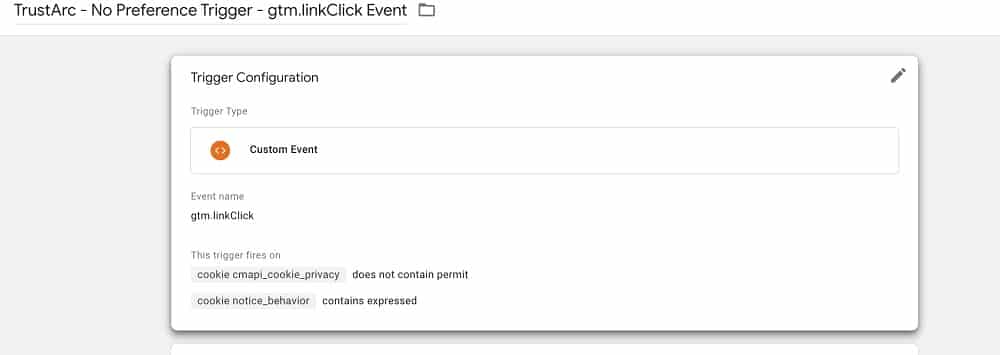
We also do the same for gtm.linkClick tags. You can see the before:
And after:
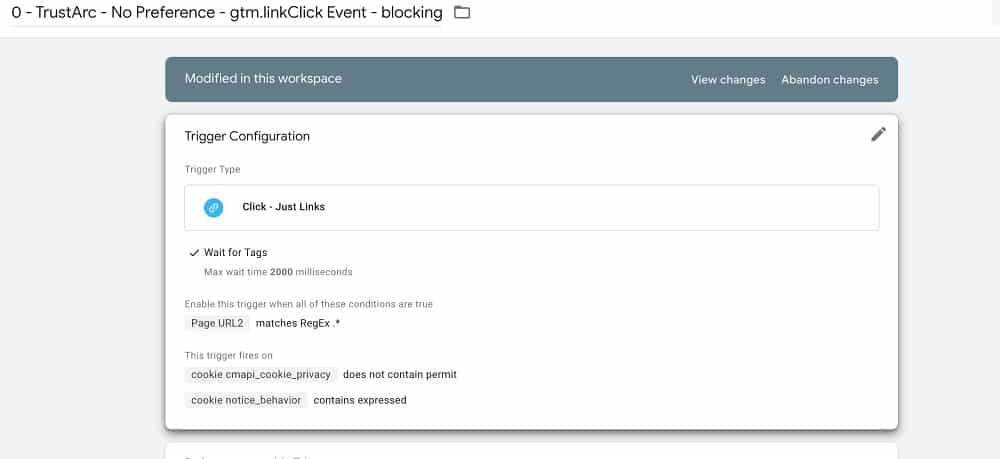
You’ll be able to see that in this case the trigger type has been changed. This helps because one is a legacy method and the other is the new method and it’s always better to have the everything up-to-date across your GTM container.
Create GAS variable if it doesn’t already exist
In this stage of the process, we will be creating a Google Analytics Settings variable as shown below:
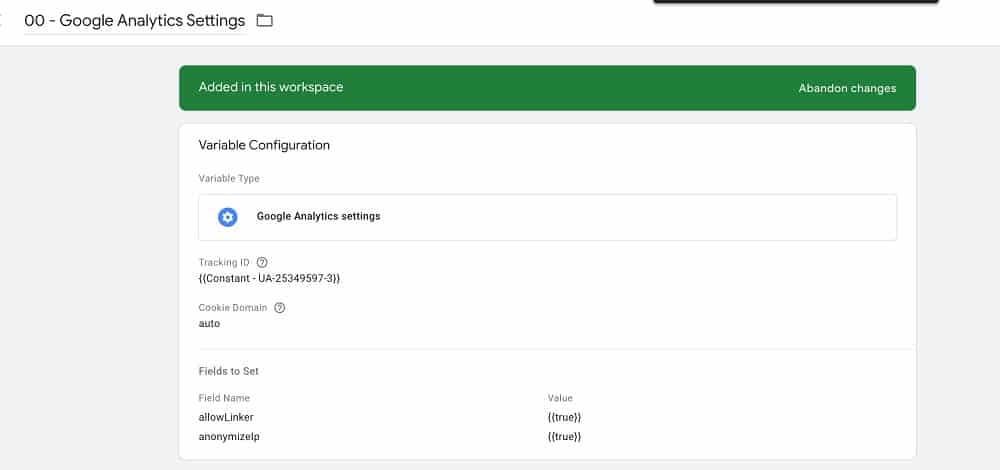
And then applying it to all Universal Analytics tags. As you’ll also be able to see below.
We do this with one variable to change settings across all tags. This saves time. The Google Analytics settings variable applies the ‘auto’ setting for cookie domain. For more about cookie domain settings, you can see here. But it is essentially used for cross-domain tracking and helps with anonymisation.
The final step of the GTM clean-up and the final actions of our tool consists of three parts:
- Update fields to set from true, false to variables
- If label or value empty set {{undefined}}, 0
- If no GAS set {{00 – Google Analytics Settings}} and overrideGaSettings to false
Update fields to set from true, false to variables
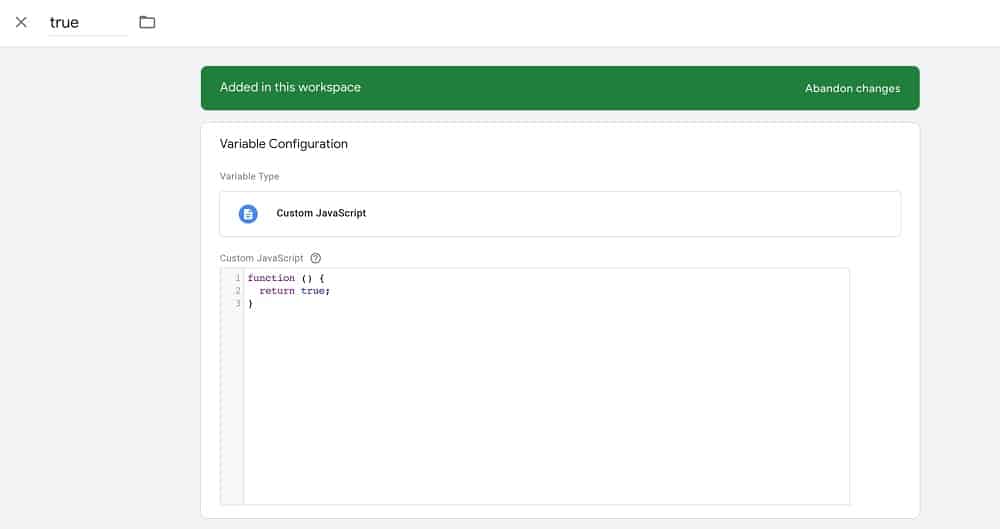
The next step in the process creates a {{true}} and {{false}} variable, in place of a true and false string, that is applied to UA tags as shown below:
False:
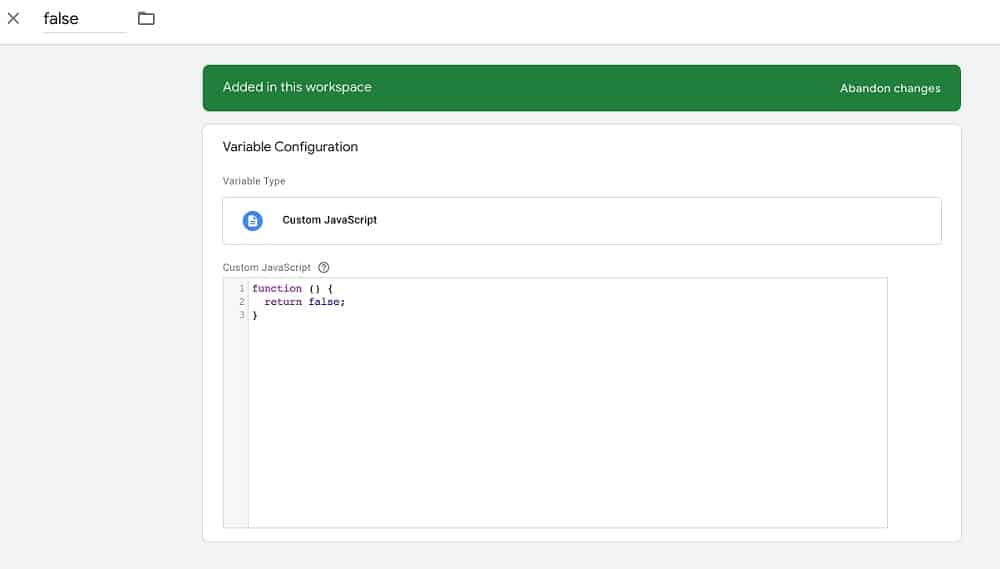
We check all UA tags and update all fields to set properties with these new variables. The reason why we do this is that all true or false value types in fields should be set to boolean and not to string as per Google’s guidance.
If label or value empty set {{undefined}}, 0
The next process of the Google Tag Manager clean-up tool is to identify all empty labels and values within UA event tags and set them as an {{undefined}} variable. Below is a screenshot of the undefined variable.
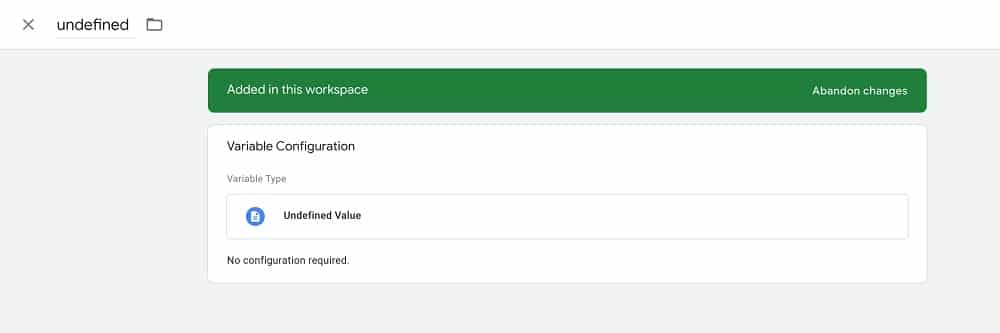
And below you will be able to see that a tag with an empty label has been set to {{undefined}}.

This means that this information isn’t sent to Google because empty strings are useless additional data.
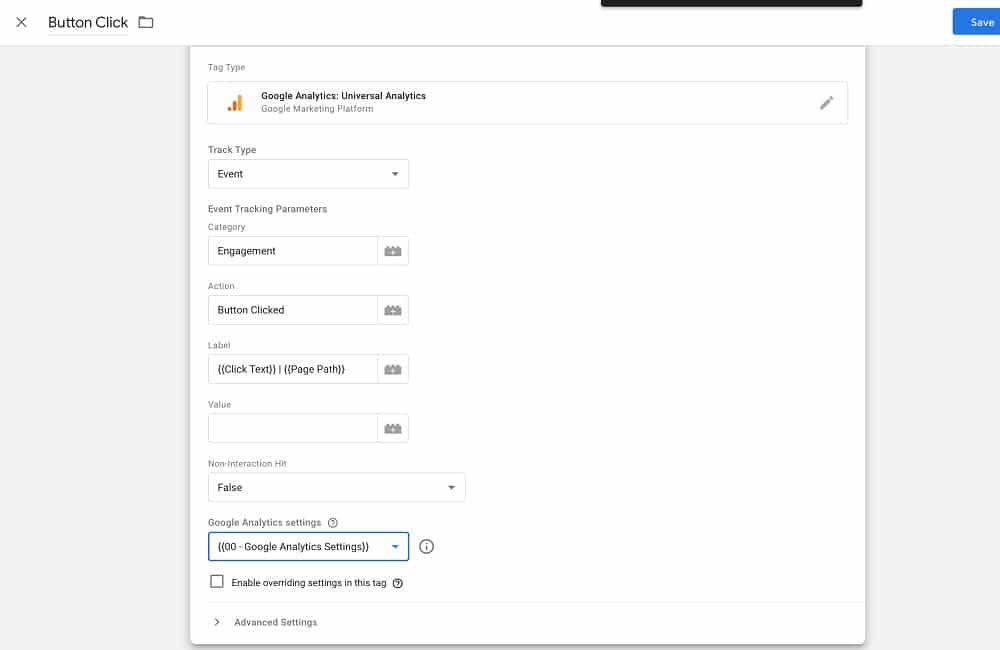
If no GAS set {{00 – Google Analytics Settings}} and overrideGaSettings to false
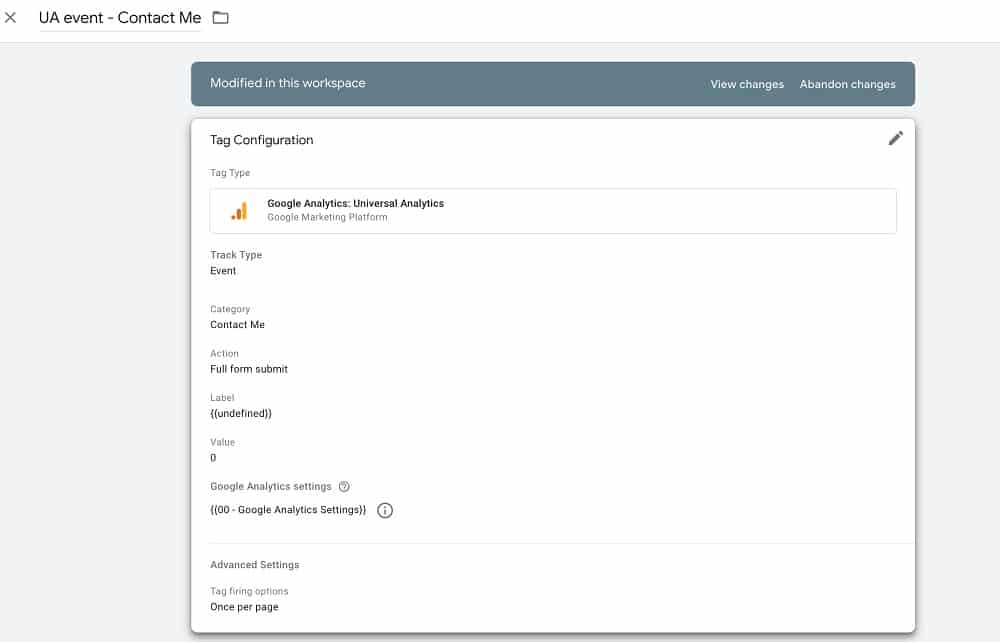
And finally, for the last stage of the process, we want to identify and UA tags with no Google Analytics Settings variable set. Here’s an example of that below:

Then we select the Google Analytics settings variable which we created before and uncheck ‘enable overriding settings in this tag’. Afterwards, the UA tag should look like this:
We do this, again, because we want all tags to have the same settings and therefore we only have to change one variable to change settings across all tags. Which saves us lots of time and removes the chance for human error.
Conclusion
And that should be it for the Google Tag Manager clean-up. Whether you used this article to better understand the tool we have created or to perform the clean-up yourself, you should have a neat and tidy GTM container. This should be the first step in your Google Tag Manager implementation and optimisation.
Now that may have seemed a bit technical for you. But this is really only just the beginning. Fret not, MeasureMinds do provide world-class Google Tag Manager and Google Analytics training as we genuinely believe in the age-old saying…
Give a man a fish and you feed him for a day; teach a man to fish and you feed him for a lifetime.