
How to set up GA4 custom events: GA4 + GTM guide
You should know by now that Google Analytics 4 is event-based, which is significantly different from Universal Analytics. All the interactions on your website are classed as events. Many interactions are collected automatically, but not all of them. That’s where GA4 custom events come into play.
What is an event?
Google Analytics 4 introduces a new data model. Every single interaction is classed as an event. This means that if a user completes the same interaction multiple times it will be classed as multiple events.
Google define events as follows:
The data you see in your Google Analytics 4 reports comes from events that are triggered as users interact with your website and/or app. For example, a page_view event is triggered each time a user views a page on your website.
Different types of events
There are different forms of events in Google Analytics 4. Each has its own purpose and can benefit your site in different ways. These include:
Automatically collected events
These events are activated by basic interactions with your app or site. They’ll start being tracked as soon as you install the GA4 base code on your site. Most automatic events don’t need additional code. These events include:
- ad_click: when a user clicks an ad
- first_visit: the first time a user visits a website or launches an Android instant app with Analytics enabled
- in_app_purchase: when a user completes an in-app purchase, including an initial subscription, that is processed by the App Store on iTunes or by Google Play.
Enhanced measurement events
These events allow for the measurement of interactions with content from within the Google Analytics interface. Google recommends that before activating enhanced measurement, you are clear on the sorts of data that will be collected. These events include:
- Scrolls: the first time a user reaches the bottom of each page.
- Video engagement: when a user views a video.
- Site search: each time a user performs a site search, indicated by the presence of a URL query parameter.
Recommended events
Alongside automatically collected and enhanced measurement events, there are several events that Google recommends including in GA4. Google have compiled a list of recommended events for your site or app. To save you time that would otherwise be spent scrolling, Google have categorised each event by industry. These cover:
- Retail/ecommerce
- Jobs, Education, Local Deals, Real Estate
- Travel (Hotel/Air)
- Games
What about Google Analytics 4 custom events?
What if you need a specific piece of information that isn’t covered? We can create custom events based on whatever parameter we want. Each GA property has a limit of 500 events.
Limitations of events
Before setting up any event, it’s a good idea to know the limits. Google have compiled a list of limits for events in GA4:
- You can create up to 50 modifications to existing events and up to 50 created events.
- Modifications require time (generally within an hour but possibly longer) before taking effect.
- Modified and created events don’t apply to historical data.
- Modifications are executed client-side before data is sent to Analytics for processing.
- Modifications execute in the order they appear in the Event modifications list.
- You can’t reorder created events.
- Modifications are processed before created events are processed.
Naming conventions for Google Analytics custom events
When setting up custom events in GA4, following the proper naming conventions is essential for maintaining data clarity and consistency. Here are some guidelines to help you:
- Character Limit: Keep your event names under 40 characters to ensure they can be marked as conversions. Exceeding this limit will prevent them from being used as such.
- Avoid Conflicts: Do not use names that GA4 reserves for automatic, enhanced, or recommended events. For example, using “click” as the name of one of your GA4 custom events can confuse you since it is already designated for tracking external site clicks.
- Naming Format:
Start with a letter.
Use only letters, numbers, and underscores (_).
Avoid spaces.
Stick to lowercase letters for better readability and consistency. - Descriptive Naming: Make event names specific and descriptive to enhance clarity. For example, instead of using “button_click,” opt for “signup_button_click” or “menu_item_click.”
- Consistent Case: Use snake_case format (e.g., signup_button_click) to maintain uniformity and prevent errors.
- Contextual Clarity: Ensure that event names convey their purpose clearly. This helps with the easier segmentation and analysis of data.
Following these conventions ensures that your GA4 custom events are well-organized, easy to understand, and effectively traceable.
How to set up GA4 custom events?
You can set up custom events in GA4 in two main ways: using the GA4 interface or Google Tag Manager (GTM). This article will show you both.
- GA4 Interface: In GA4, you can make custom events by changing current ones. It is simple and fast. However, you can only change events GA4 already tracks, such as ‘page_view’ or ‘scroll.’ You cannot create new events that GA4 does not know about.
- Google Tag Manager (GTM): GTM gives you more control and choices. You can create custom triggers, variables, and tags for tracking specific actions, like button clicks or form entries. This method is more detailed and helps collect better data.
Before you begin, check if GA4 has already recorded your desired event. Review Google’s list of automatically collected events, enhanced measurement events, and recommended events. Also, please pay attention to event names to keep them from clashing with names already in GA4.
We will show you two ways to set up custom events in GA4. You can then pick the one that works best for you.
Setting up a custom event from GA4’s interface
The GA4 interface offers a quick way to set up custom events based on existing ones, perfect for when you don’t have Google Tag Manager installed. While it’s not as flexible as GTM, it’s still an excellent option for basic event tracking.
To show you how this works, we’ll walk through how we set up tracking for the sponsor pack download on our GTM4ward event website.
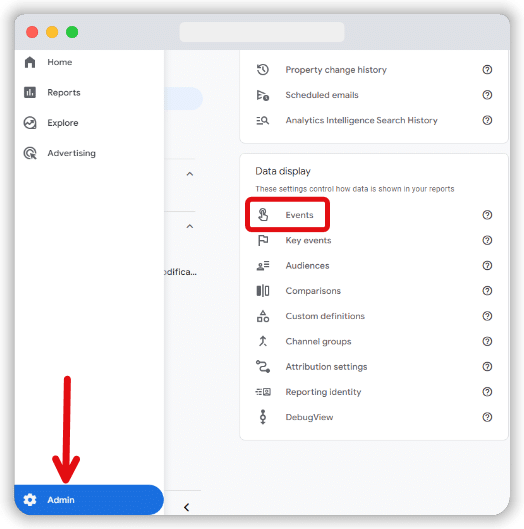
First, log into your GA4 account, click on the gear icon from the bottom left to open the admin section, and click the “Events” option from the “Data display” section on the admin page.
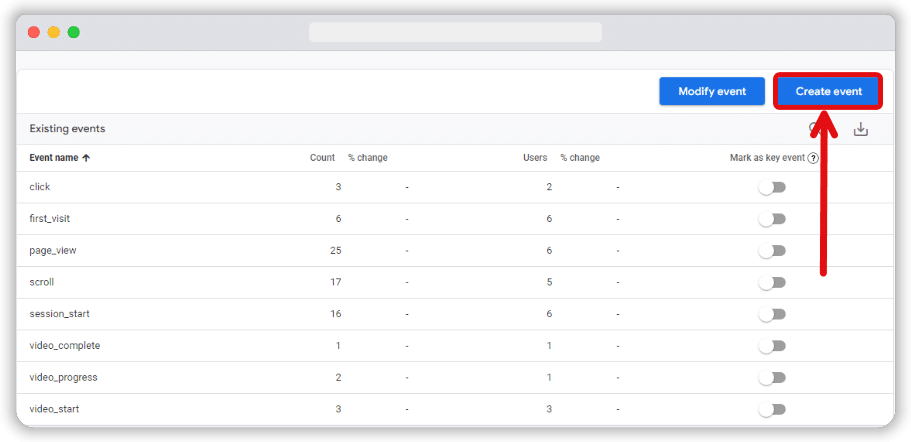
Select the “Create event” button from the top right of the next page.
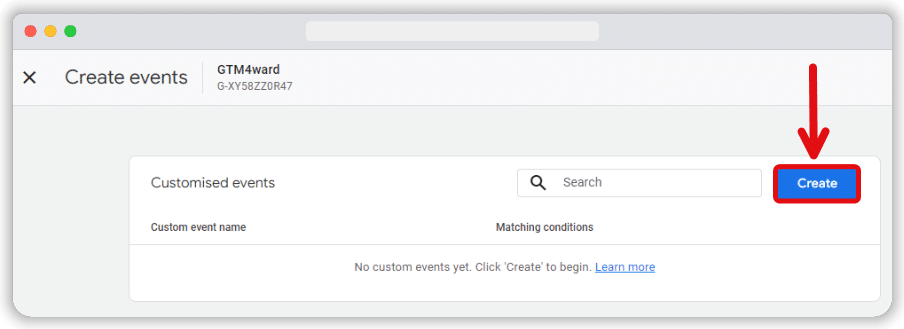
From the next sliding window, click on the “Create” button.
Name your custom event on the following screen and configure the necessary parameters.
Note: When choosing the name of your desired event, consider the naming conventions of GA4’s custom events.
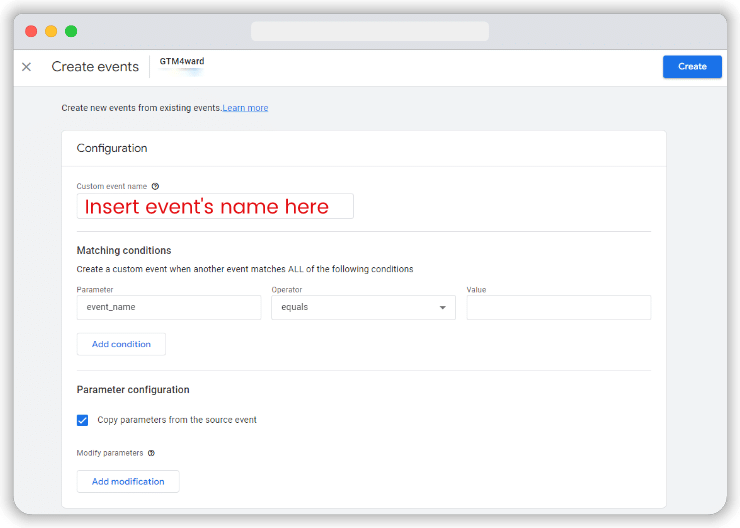
In this case, we named the event “sponsor_pack_download.” This event is based on the file_download event, one of the automatically collected events in ga4. So we set the “Parameter” to “event_name,” the “Operator” to “equals,” and the “Value” to “file_download.”
To specify the download of our sponsor pack, we set the parameter “file_name” to contain the value “gtm4ward_sponsors_pack.”
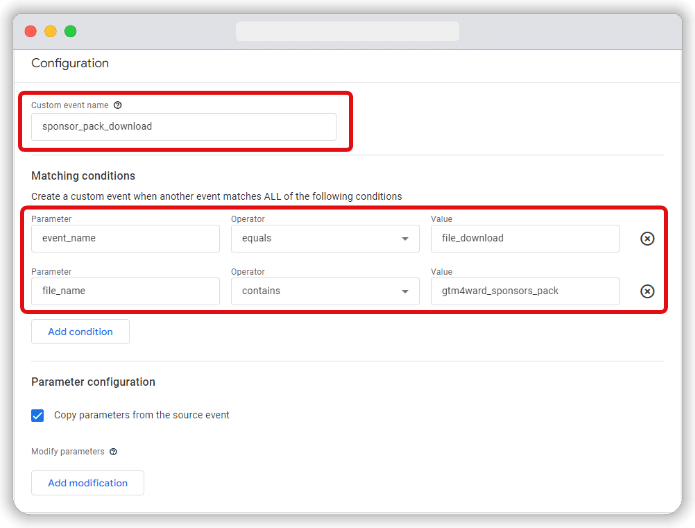
Finally, we need to save our new custom event.
Remember, this custom event will only trigger when an action on your website matches all the conditions we’ve set. Now that the custom event is set up, the next step is verifying it’s tracking correctly. We’ll cover this in more detail later.
Using GTM to create GA4 custom events
Google Tag Manager is your best friend when you want complete control over your event tracking. With GTM, you can create entirely new events that don’t rely on existing GA4 events. This flexibility is great when you want to track specific actions that might not already be captured.
Let’s say you want to use GTM to set up custom event tracking for menu link clicks on our site. Here’s how you can go about it:

Setting up the right trigger in GTM
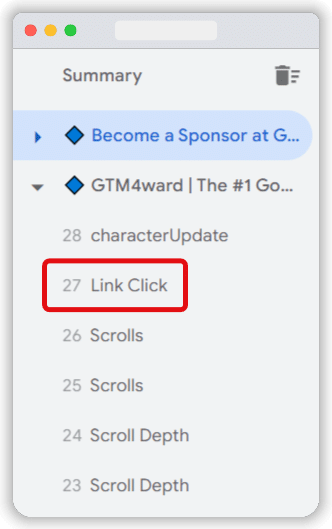
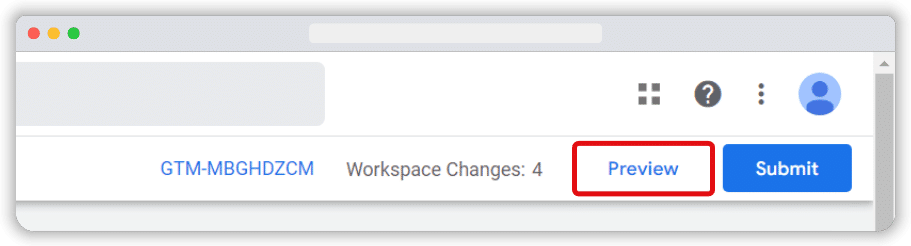
The first step in creating a GA4 custom event using GTM is setting up the correct trigger. Trigger tells GTM when the events should fire. First, enable GTM’s Preview mode, then interact with the element you want to track. In this case, click any of the menu links on your website. You should see a “Link Click” event in the left sidebar of the Tag Assistant interface.
If you don’t see the “Link Click” event, here are two things to check:
- Ensure you have at least one Just Links trigger active in your GTM setup.
- If you’ve enabled GA4’s Enhanced Measurement, verify that File downloads or Outbound links tracking is enabled under the Enhanced Measurement settings.
If Enhanced Measurement isn’t enabled or doesn’t cover the action you want to track, you’ll need to create a trigger manually. In this case, you need a “Just Links” trigger. Here are the steps you can take:
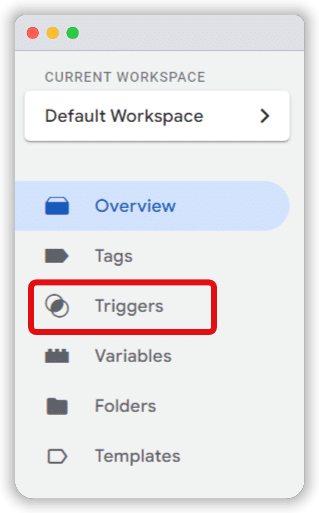
First, log into your GTM account. Then, click the ‘Triggers’ option from the GTM dashboard.
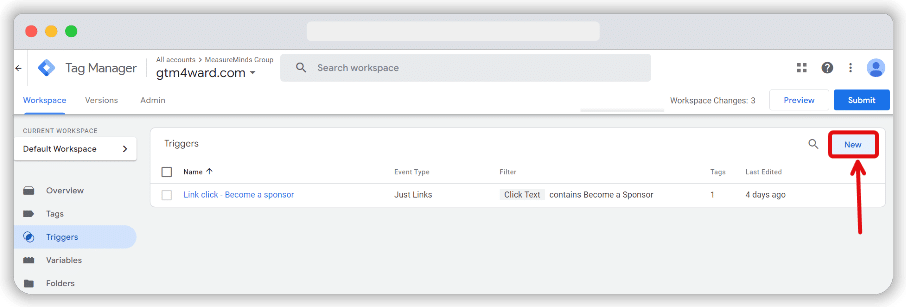
From the next window, click on the “New” button from the top right corner.
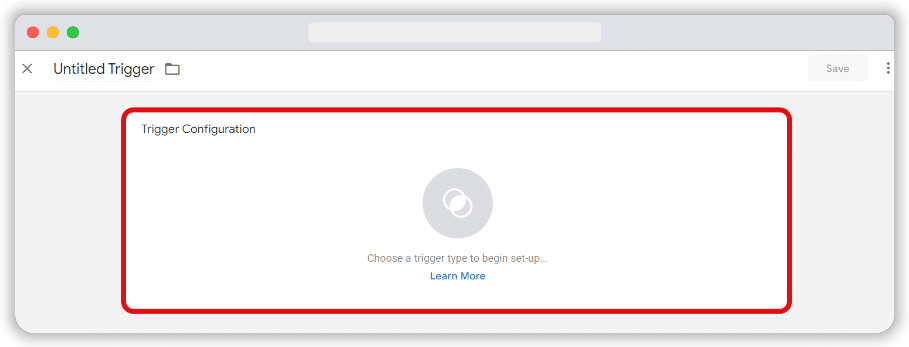
That will bring up the ‘Trigger Configuration’ window. Click on the ‘Choose a trigger’ box.
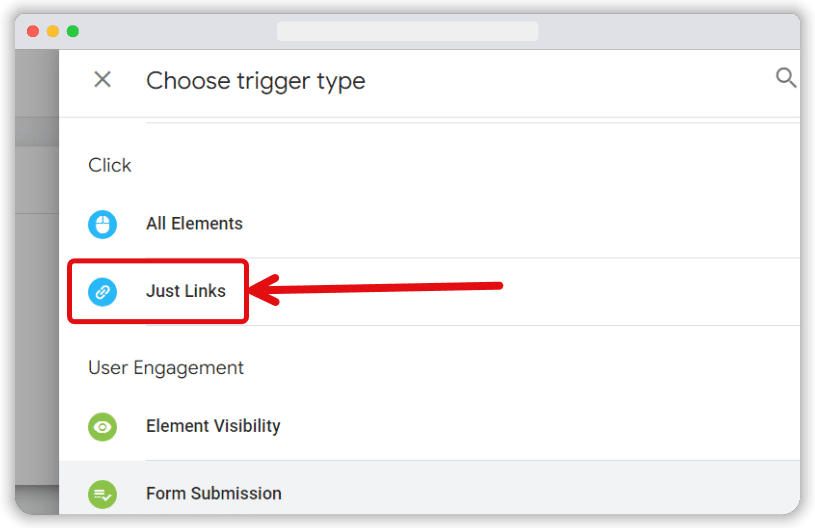
This will bring up a list of Triggers. Here, you’ll see a selection of options for creating a trigger. We’re searching for the ‘Just Links’ option. Scroll down the list and choose that option when you find it.
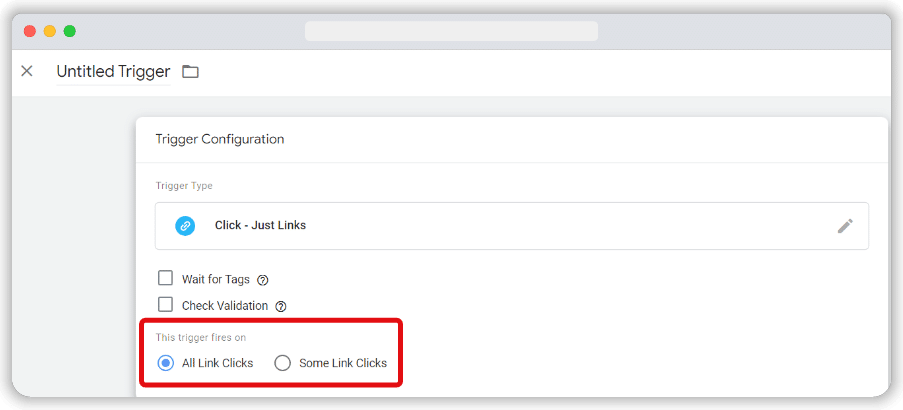
Select the ‘All Link Clicks’ option from the new window in the “This trigger fires on” section.
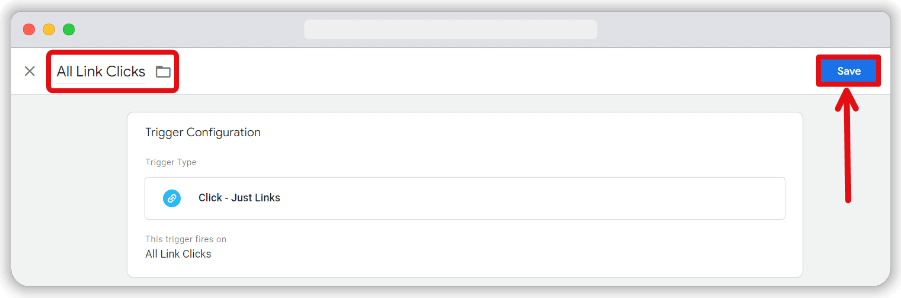
Now, name your trigger and click save.
Enabling the required variables in GTM
Variables in Google Tag Manager are placeholders for dynamic values on your website or app. They help triggers decide when to fire and capture essential data for tags. GTM provides built-in variables for most setups, but you can also create custom ones for specific needs.
Now that you’ve set up your trigger, follow these steps to enable the required variables:
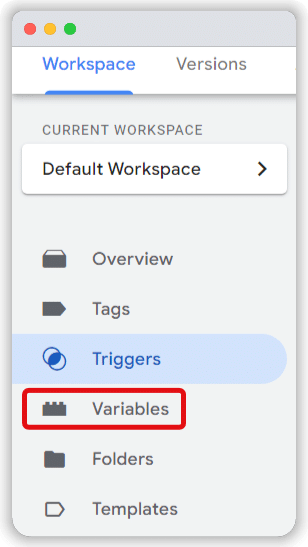
Go to Variables from the GTM toolbar, located just below Triggers.
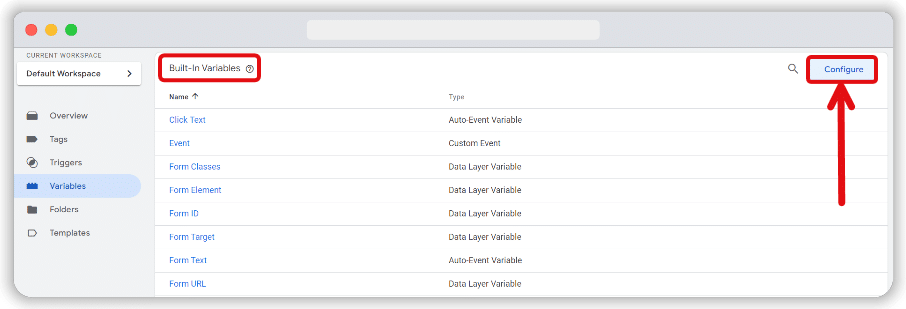
You’ll now be on the Workspace page. In the box labelled Built-in Variables, click the “Configure” button.
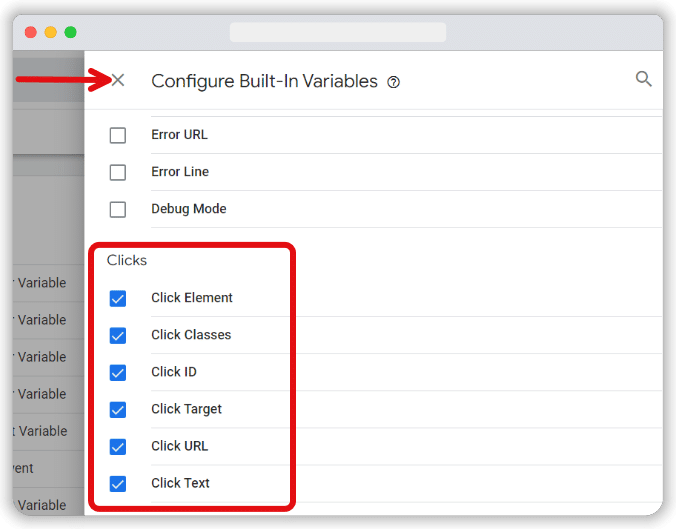
A list of variables will appear. Scroll down until you find the options labelled Clicks. Select all the options under it, then click the X icon from the top left corner to close the configuration panel.
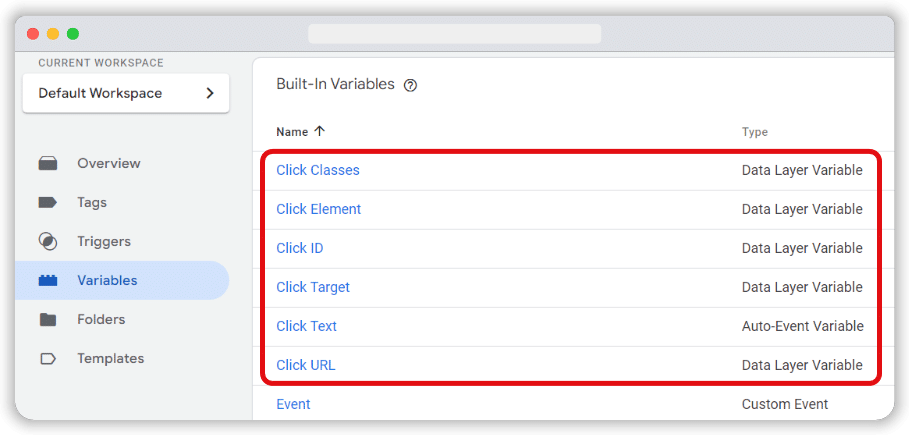
The selected options will now appear in the Built-In Variables section and will be ready for use in your tag and trigger setup.
Updating the Trigger with additional conditions
We need to add more specific conditions to fine-tune the trigger we set. To do so, start by refreshing GTM’s Preview mode by clicking the Preview button again.
Now, go to your website and click on several menu links. Go back to Preview mode, and you should start seeing Link Click events in the left-hand sidebar. Click on the first “Link Click” event, then navigate to the Variables tab.
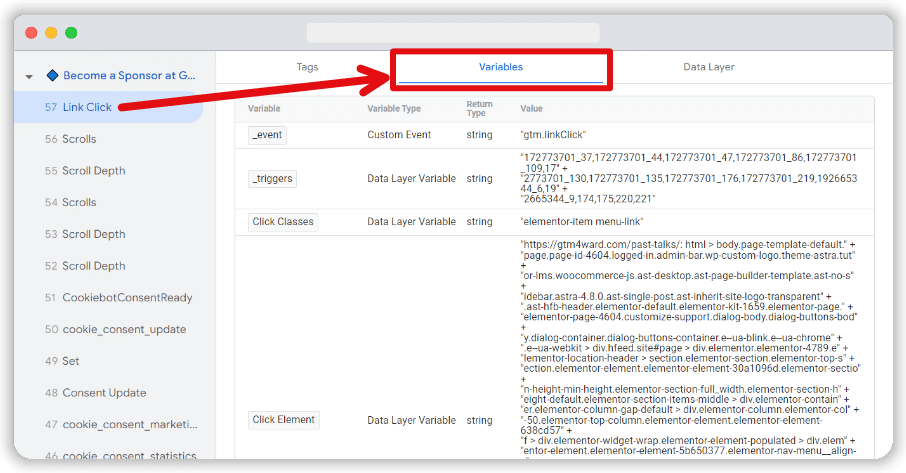
Next, click on the second Link Click event and inspect the available variables. The goal is to find a variable that distinguishes the menu link clicks from others. This will allow us to fire the correct GA4 event based on specific interactions.
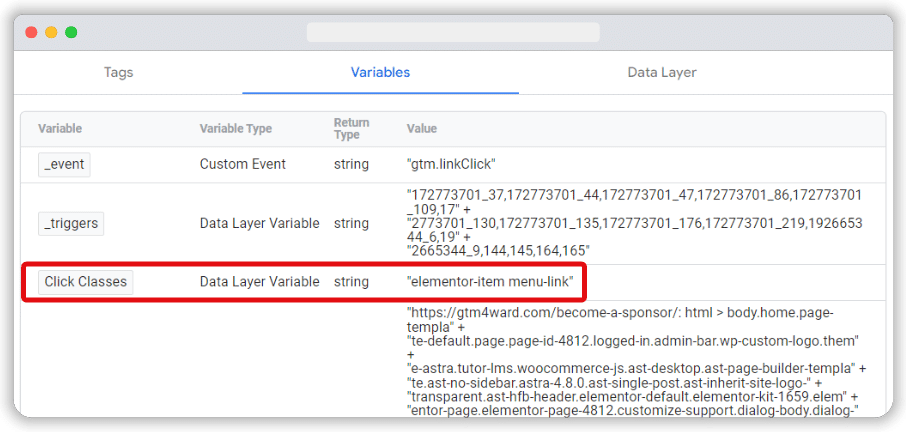
In this case, both menu links have the same Click Classes value: ‘elementor-item menu-link’. We’ll use this value to update our previously created Just Links trigger.
Now, go back to the list of triggers in your GTM container and click on the previously created trigger for All Link Clicks. Edit it by switching the trigger firing condition to “Some Link Clicks” & then adding a new condition: Click Classes contains ‘elementor-item menu-link’. And rename the trigger as “Link Click – Menu”.
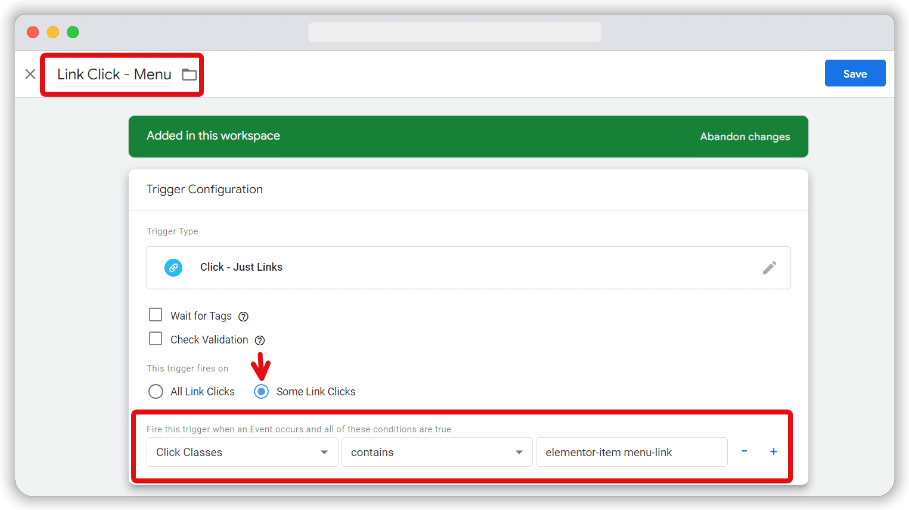
Finally, save the trigger. This additional condition refines the trigger so it only fires on the menu link clicks, ensuring more accurate event tracking in GA4.
Creating a Tag based on the right Trigger
Now that you’ve created a trigger, you must create a new tag alongside it. Once again, this requires going to your GTM toolbar. From there, select ‘Tags’.
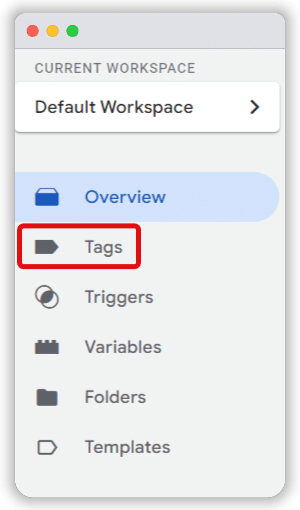
Here, you’ll see a list of all the different tags that you have created. If this is your first time creating a tag in GTM, this list will show as empty. Hit ‘New’ button to be begin creating a tag.

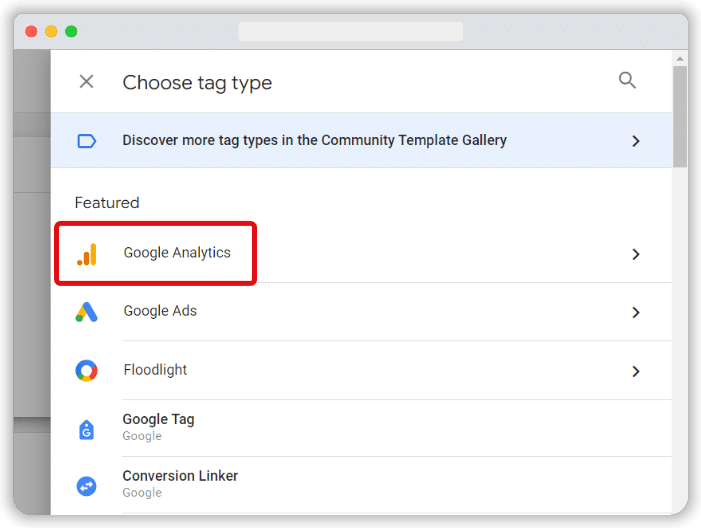
You’ll now be presented with two options ‘Tag Configuration’ and ‘Triggering’. Select the former.

A list of options will appear. Because we want to create an event within GA4, we need to select ‘Google Analytics’ as the tag type.
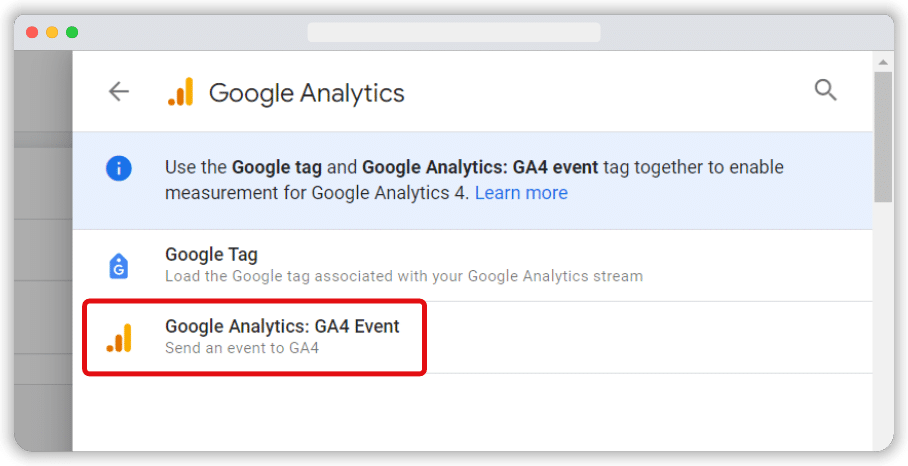
From the next window, Choose ‘Google Analytics: GA4 Event’.
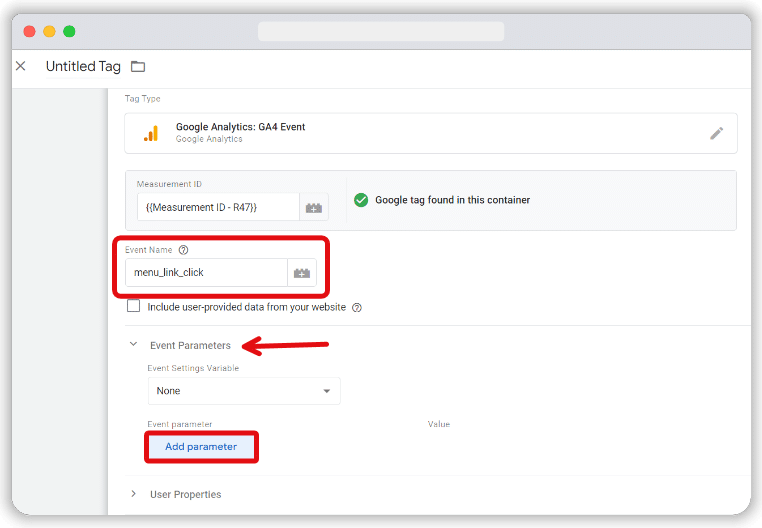
Now that we’ve set up the trigger, it’s time to configure your tag. First, enter the Measurement ID of your GA4 data stream. If you’ve already created a constant variable for the ID, select it. Otherwise, you can manually paste the ID in the field.

Next, choose an event name that makes sense for the action you’re tracking. Feel free to choose a name that fits your needs, but remember to follow GA4’s naming conventions & character limits. For this example, let’s use menu_link_click as the event name.
However, just sending the event name alone might not provide enough detail. It’ll help to know which specific menu items are being clicked. To capture that extra information, we can send additional custom event parameters.
To add custom parameters, expand the “Event Parameters” section in the GA4 event tag configuration box and click “Add parameter” button.
While GA4 offers some default parameters like link_url and link_text, we will create custom parameters to see how you can do that. Let’s set up two custom ones:
For the first parameter, name it menu_link_url. In the Value field, use GTM’s built-in variable, Click URL, by clicking the Insert Variable button and selecting {{Click URL}}.
Now, let’s add a second parameter called menu_link_text to capture the text of the clicked menu item. Use the built-in variable {{Click Text}} for this field.
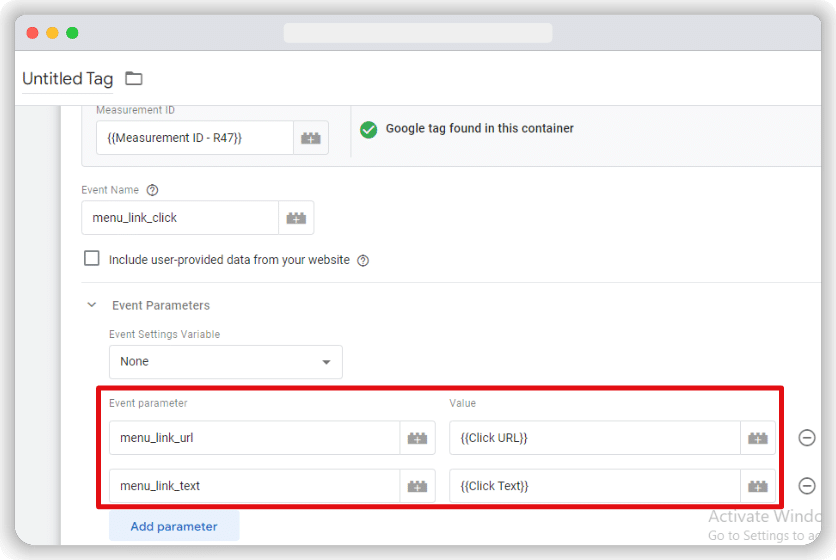
Feel free to add more parameters if necessary. GA4 allows up to 25 parameters per event.
After setting up the event name and parameters, assign the “Just Links” trigger we modified earlier to this tag as its trigger.
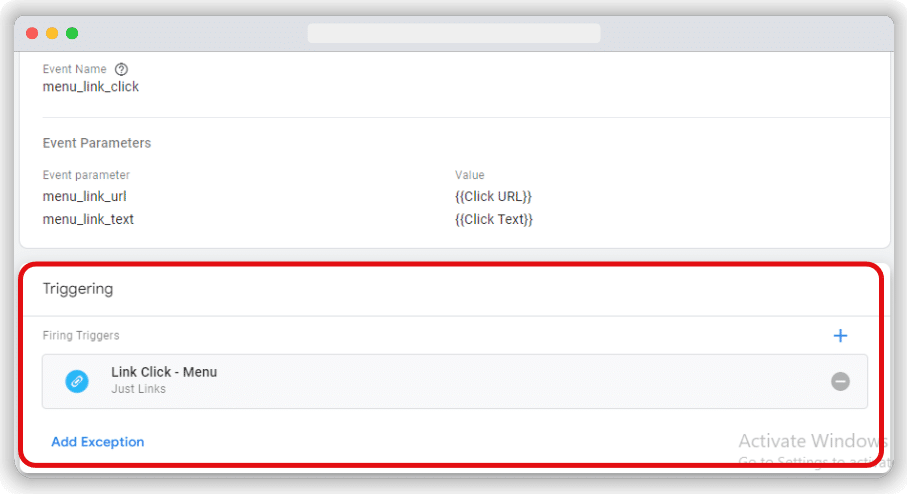
Now, we need to name this Tag & hit the “Save” button.
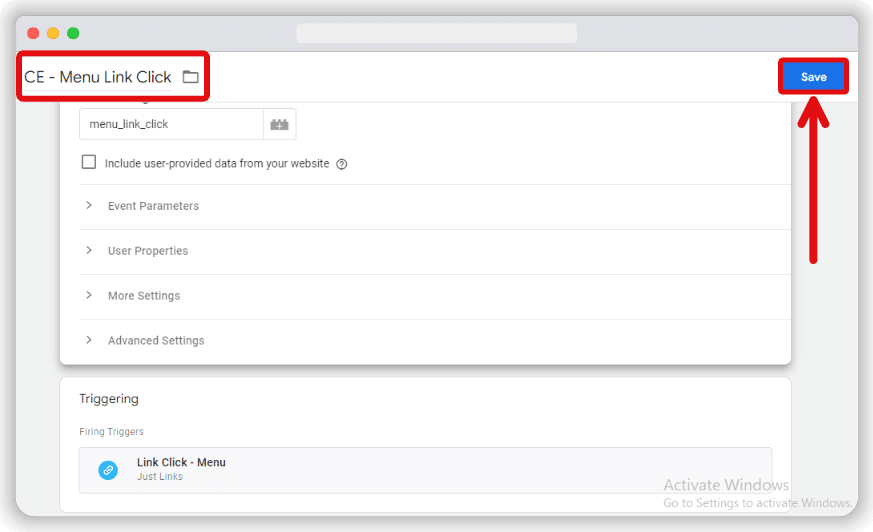
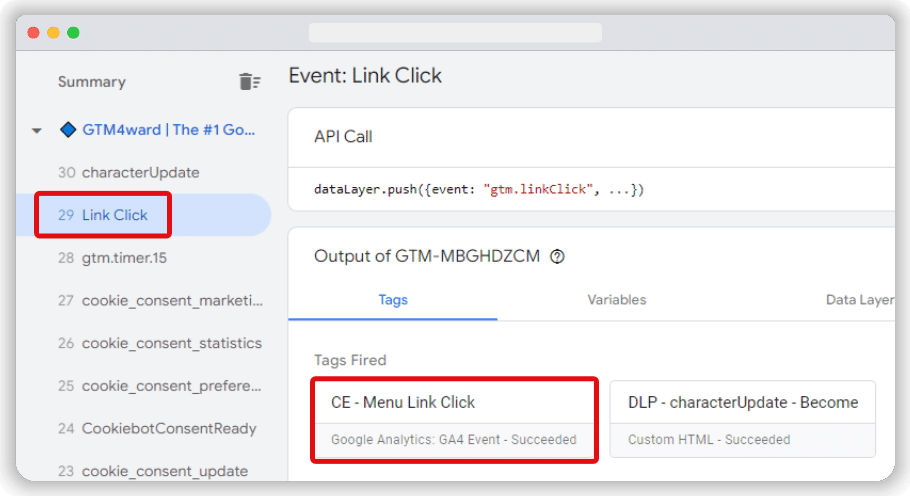
Now, refresh GTM’s Preview mode. Go to your website and click on a few menu links. Return to Preview mode to confirm that the menu_link_click event has fired successfully.
Verifying your custom events in GA4
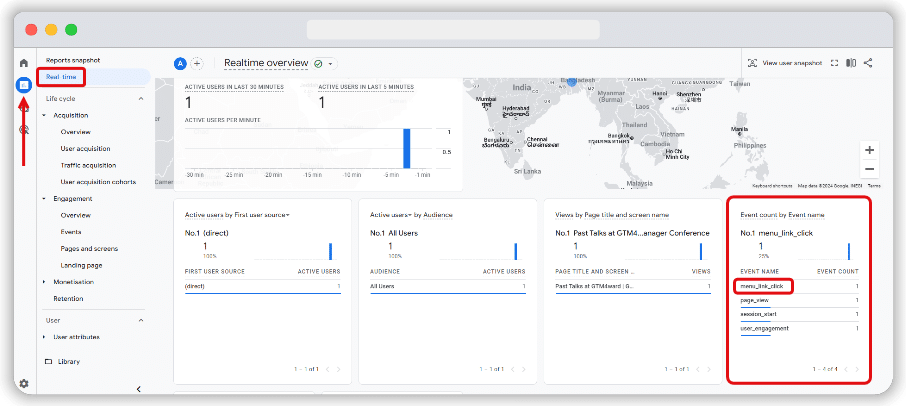
After setting up your custom event, it’s crucial to ensure it’s being tracked properly. The quickest way to check is by using the Real-time report in GA4, which displays user interactions from the last 30 minutes.
To verify, navigate to “Reports” and click on “Real-time.” Now, trigger the event manually by interacting with the website (in our case, clicking the menu links).
If your custom event is functioning correctly, it should be listed under the “Event count by Event name” section of the Real-time report.
Checking custom events with DebugView in GA4
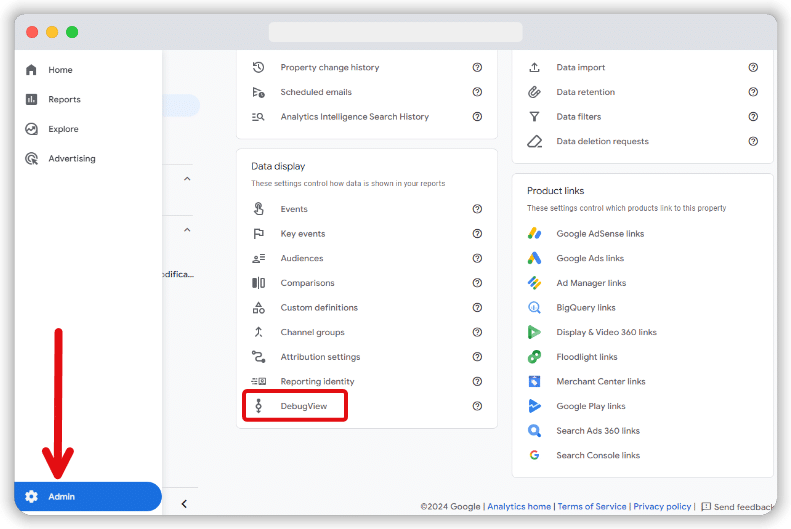
If your custom event doesn’t appear in the Real-time report, you can use GA4’s DebugView feature to gain more in-depth insights into how events are being recorded and processed.
First, enable debug mode on your test device. Once enabled, go to GA4’s Admin section and click on DebugView.
In DebugView, you’ll see a live stream of all events firing on your website, including the custom ones you’ve set up. This allows you to check whether your event is firing correctly and to troubleshoot any potential issues.
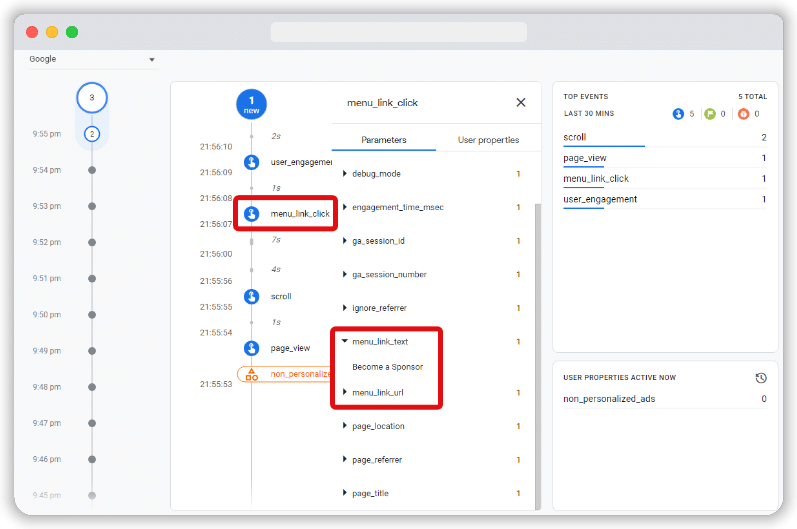
Using DebugView ensures that your custom events are working as expected and helps you catch any problems early on so you can fine-tune your tracking.
Note: While you’ll see these custom parameters in GA4’s Real-Time and DebugView reports, they won’t appear in other standard GA4 reports unless you register them as custom dimensions in your GA4 account. We’ll cover how to do that in the next section.
How to view custom events in GA4 reports
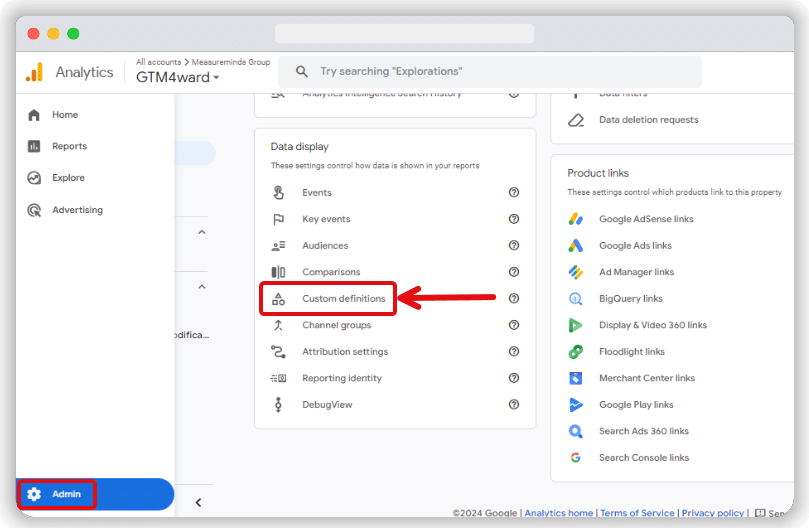
To make sure your custom parameters appear in GA4 reports such as Explorations, Funnels, and even standard reporting cards, you need to register them as custom definitions. Here’s how to set it up:
Registering Custom Definitions
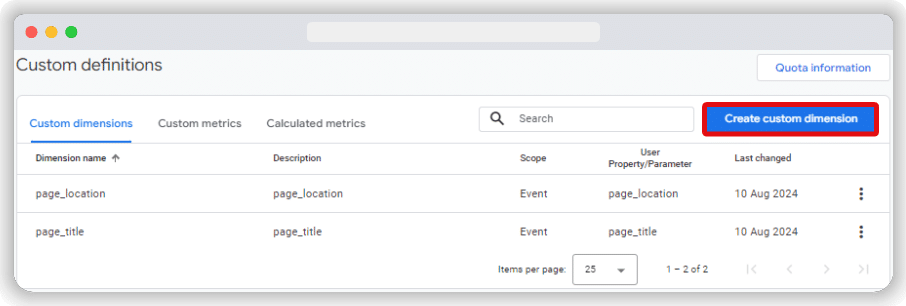
Head to your GA4 account, go to the Admin section, and select “Custom Definitions.” We must register both here since we created two custom parameters in our menu_link_click event.
From the next screen, Click the “Create custom dimension” button.
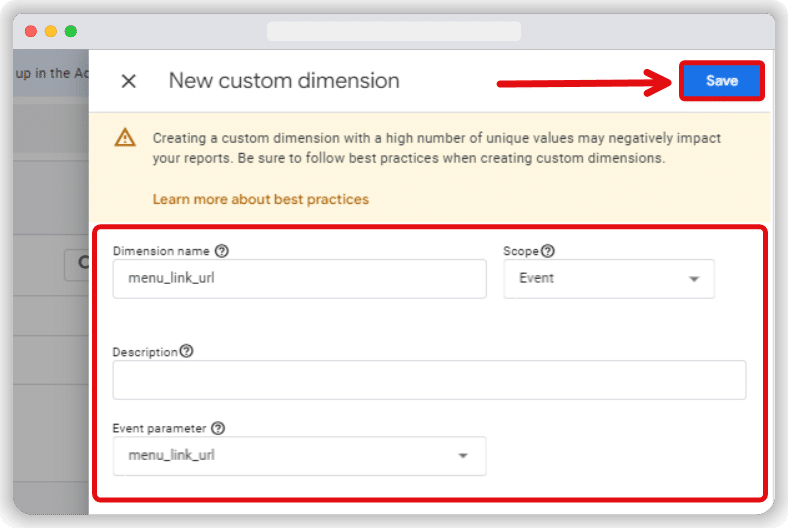
In the sliding window, enter the following details:
- Dimension Name: This is how the parameter will appear in your reports. Choose a clear and descriptive name, like “menu_link_url” or whatever makes sense for your analysis.
- Scope: Choose Event because we only want to apply this custom parameter to specific events, not all events triggered by the same user.
- Event Parameter: Enter the exact parameter name as you defined it in Google Tag Manager. For example, if you used menu_link_url in GTM, type that exactly here. Don’t worry if the field doesn’t auto-complete, you can type it.
Once you’ve done all that, click the “Save” button from the top right corner.
After that, follow the same steps to register the second custom parameter, which in our case is menu_link_text, and save it.
Now that your custom dimensions are set, the parameters will appear in your GA4 reports. Remember that it may take up to 24 hours for the data to appear in all relevant reports.
Viewing custom events in GA4 reports
After setting up and verifying your custom event, you should check the data it tracks. GA4 provides an Events report allowing you to view all the events on your site.
To find your custom event, go to your GA4 account and navigate to Reports > Engagement > Events. This will open the Events report, which lists all your tracked events.
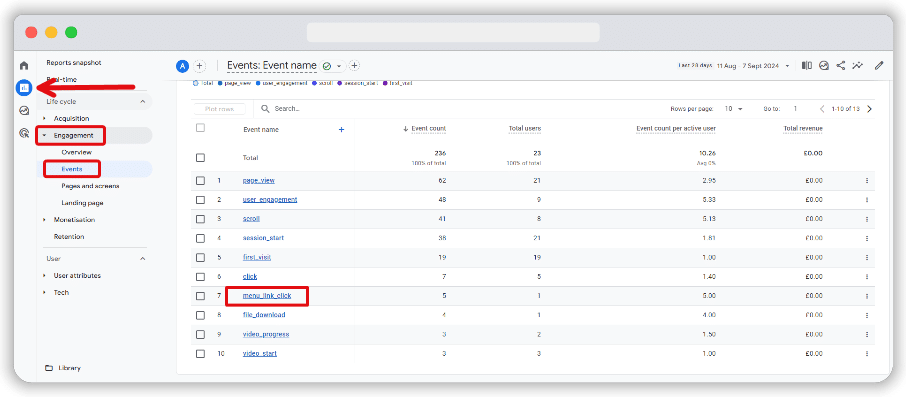
Scroll down to locate your custom event by name. Click on it to access more detailed data, including how often the event was triggered and its associated parameter data. In our example, page_title and page_location cards clearly show that these events were triggered by menu link clicks on the website.
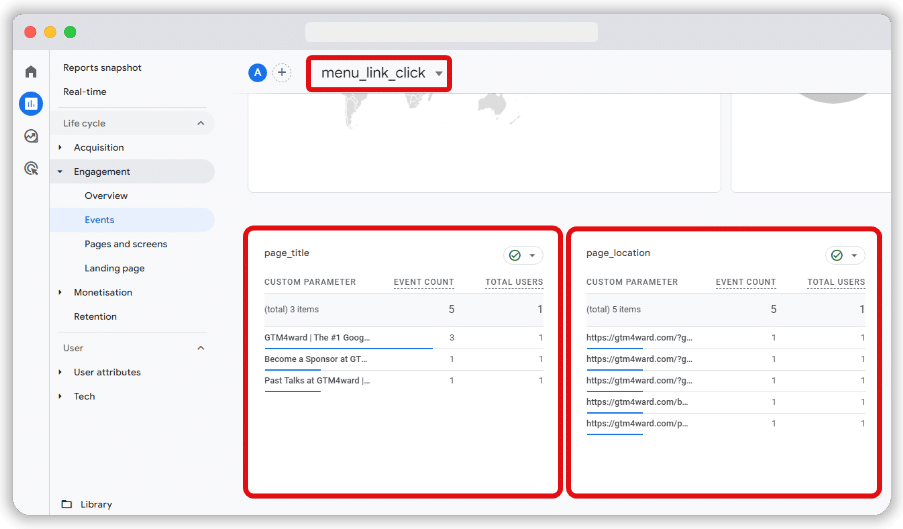
This type of breakdown helps with analysing the performance of custom events and understanding how users interact with different parts of your website.
Setting custom events as Key Events in GA4
If your custom event tracks meaningful interactions, like conversions or high-value user actions, you can mark it as a key event in GA4. This way, you can monitor and analyse these events more closely.
Here’s how to do it:
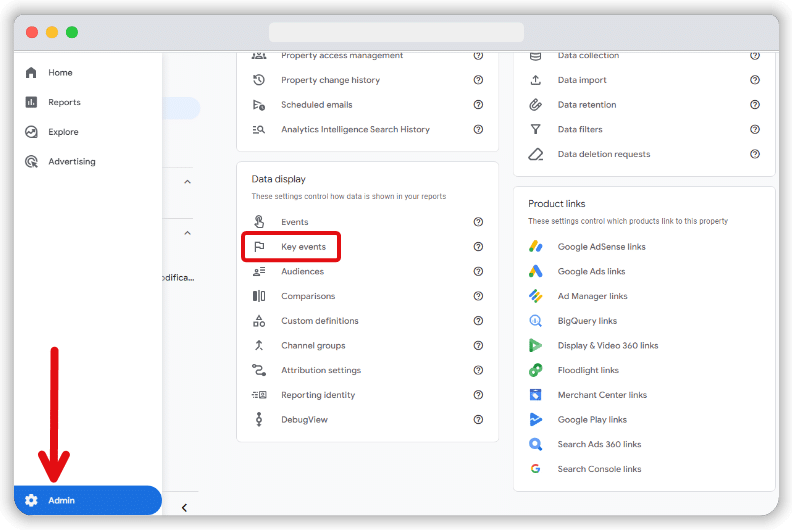
Click the gear icon in the bottom left corner to access the Admin section of your GA4 account. Then, select “Key events” from the “Data display” section.
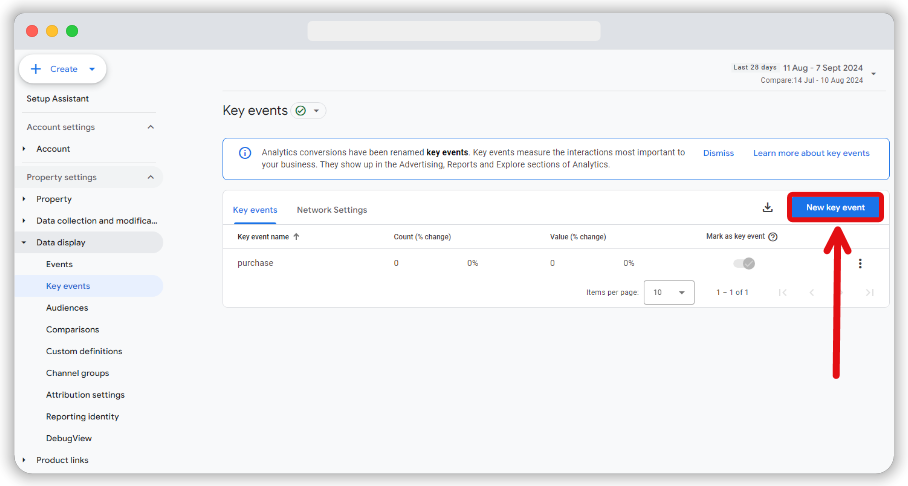
In the next window, click the “New key event” button located in the top right corner.
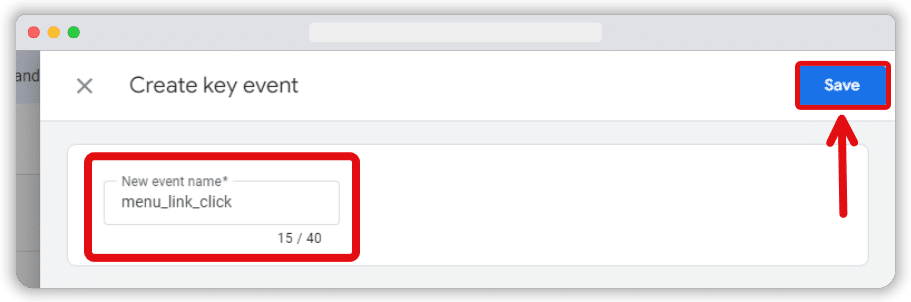
Enter the name of your custom event exactly as you created it, then click the “Save” button.
Marking an event as a key event is helpful for monitoring conversions or other high-impact events on your website.
Google Analytics Help Community
It’s understandable if you want all the help you can get with GA!
The Google Help Communities are a place for Google users to ask questions or provide feedback about Google products and services. Here, you can discuss products and services with other Google users and enthusiasts. You’ll find tips for using Google products and services from the community. Importantly, you can get help from other users and Google enthusiasts on almost any topic.
You’ll find thousands of threads on all sorts of topics. Type ‘events’, for example, into the search bar and you will find a long list of threads! If the topic you wish to discuss isn’t there you can create your own thread. It’s definitely worth taking a look.
You can also contact us for help with your GA & GTM implementations.
Beat the competition
It is easy to see the importance of good data management. It would be understandable, however, if this still seems quite daunting. We have helped many businesses, in sectors from banking and Local Government to healthcare, to navigate the hurdles involved and deliver real benefits to their organisation. We would love to help your business to thrive.
Give us a call to see how we can give your business a head start.
