GA4 Custom Dimensions Guide 2026 [Cheatsheet]

Google Analytics 4 (GA4) is the latest version of GA. It introduces several new features and changes, one of the most significant of which is that the number of Custom Dimensions available has increased to 25 user-scoped and 50 event-scoped in GA4 vs only 20 in GA3.
But what are they? And how do I set them up in GA4? This guide will give you a complete overview of GA4 custom dimensions.
GA4 custom definitions (events and dimensions) cheatsheet
Before we get into everything, if you’re looking for quick advice on native and custom definitions config… We’ve created a GA4 custom definitions cheatsheet so you can quickly look up native definitions and custom definitions and how they are configured. It’s free.
If you want to get a full guide on custom dimensions including, what they are, how to set them up, how to best use them, quotas and more… Read on!
What are GA4 custom dimensions?
GA4 custom dimensions are attributes or pieces of information that you can collect about your customers that define them. This could be something like:
- Which browser are they using?
- Which landing page did they first land on?
- What pricing plan do they subscribe to?
- Transaction ID
- Country
These attributes help define a user and that’s what dimensions do.
You will always see them in the first column of your tables. As shown below.
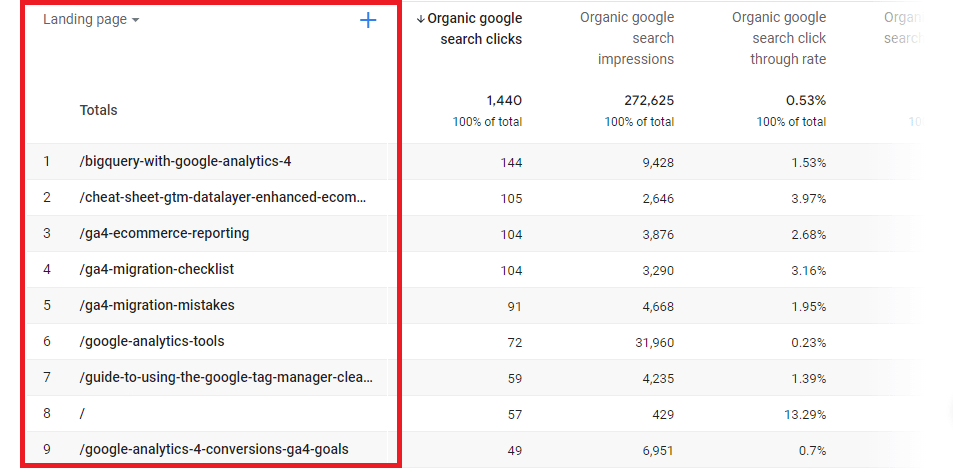
In the above picture, Landing Page is the dimension. This is because in this report we are looking at which landing page is driving the most traffic. So whichever landing page the user landed on is what defines the user and where they entered the site.
There are many different dimensions and Google has a vast amount of ‘native’ dimensions that it collects automatically. These can be age, country, gender, page title etc.
But although GA4 has well over 150 different native dimensions, they don’t fit every single situation you may want to define. This is where GA4 custom dimensions come in.
How do GA4 custom dimensions work?
GA4 custom dimensions work exactly the same as native dimensions. However, the difference is that in order to track custom dimensions, you must define them and add code to your website to track them.
We highly recommend using Google Tag Manager to do this.
GA4 custom dimensions are therefore really useful because they allow you to track other things that matter to your site.
Examples of custom dimensions
It may be helpful for you to see some examples of custom dimensions and how they could be useful attributes to track:
1. Author
Adding author as a custom dimension in GA4 is useful because it allows you to understand which authors are the most successful.
Is a certain author generating a high amount of engagement leading to conversions? You may want to consider using that author more.
Paired with a secondary dimension like ‘content group’ (also a custom dimension) you can then start to understand even finer details. Is a particular author writing more engaging SEO content rather than CRO content? You may want to consider having them write more SEO content and have someone else write the CRO content.
2. Post type
With the post type dimension, you can define the different types of posts and/or content on your site and see which is the most effective at engaging users or generating conversions.
Are your recipe pages generating a lot of clicks but your blog on the ‘best spices to use’ is better at converting? This may help inform you on your marketing strategy.
3. Define an attribute specific to your product
You may want to look at the way users behave on your site depending upon what product they bought or what product level they have.
For example, you may want to perform some analysis on the different types of customers on your site. Those who subscribe to your free plan will likely behave much differently to those who subscribe to your premium plan.
Whatever analysis you choose to do, it may help you understand how to move free users to your premium plan.
What are custom definitions?
Custom definitions are essentially what encapsulates both custom metrics and custom definitions in GA4 – a name given for both of them. We will show you how to configure custom definitions (custom metrics and custom dimensions) later on.
At the end of the day, the way you use custom definitions is entirely up to you and may be unique to your site. Hence the name custom!
Why you should use native definitions where possible
So we’ve established that custom definitions are great. They allow you to tailor the way Google Analytics works and what data it delivers when the native definitions (definitions that are automatically in GA4) don’t fit your situation.
However, there are currently a number of problems that arise when using custom definitions in GA4.
1. Native definitions do not trigger 500-row cardinality
Cardinality is a huge problem in GA4. It essentially starts grouping the rest of your data when you reach over 500 rows into the ‘other’ row. This means that you potentially miss a lot of data and are unable to properly analyse it.
This however doesn’t happen when using native definitions.
2. Native definitions do not affect the 25+25 dimension limit
There is a limit on the amount of GA4 custom dimensions and custom metrics that you can have. Reaching that quota means you won’t be able to create anymore. So you should take advantage of the native definitions where possible.
3. Native Definitions do not need to be manually added to GA4
Native definitions are automatically in GA4, so you don’t need to use time and resources adding them like you would have to when creating a custom dimension or custom metric.
4. Native definitions have fixed names so they are easier to standardise for reports and BigQuery.
One of the best things about the new Google Analytics is that you can link GA4 and BigQuery for free. This used to cost a whopping $150K because you had to purchase GA360 to do this.
Using custom definitions adds another layer of difficulty when using BigQuery though. This is because custom definitions can have lots of different names whereas native definitions are pre-defined and therefore fixed by Google.
So there are 4 reasons why you should aim to use native definitions over custom definitions. But if you’re really keen on using custom dimensions, let’s show you how to set them up.
How to set up GA4 custom dimensions
Google Analytics 4 enables you to collect and analyse data that generates automatically. They are super easy to set up and a great way to gain insight into the events you’re tracking on your site. This guide walks you through the straightforward, easy, and quick process of creating your custom dimensions:
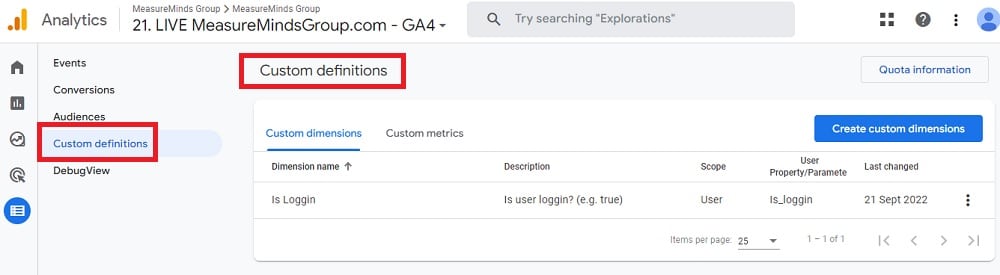
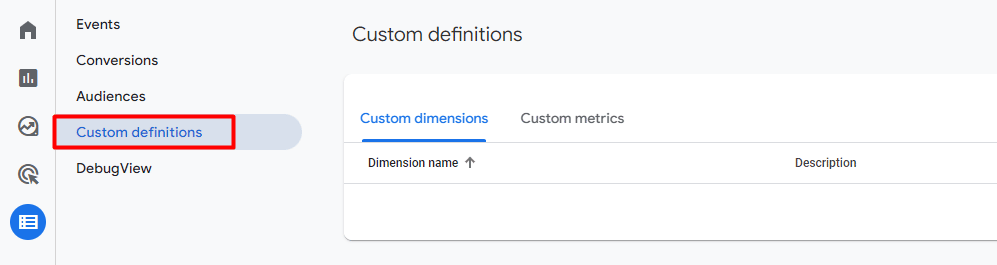
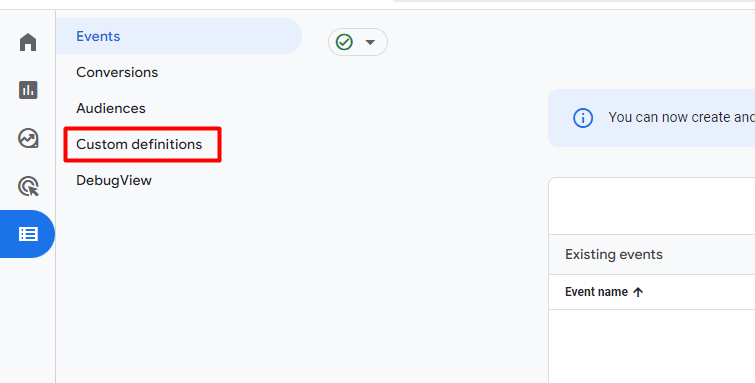
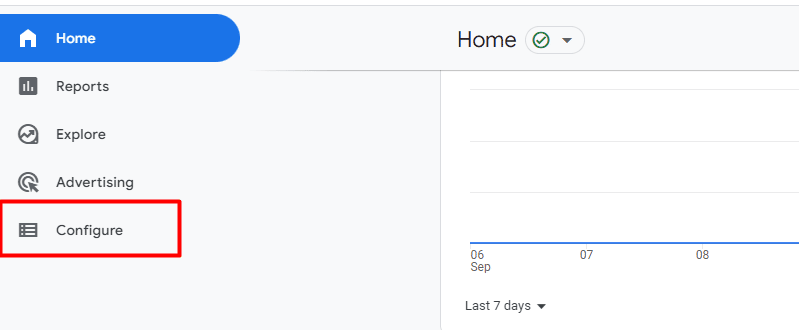
1. Go to the configure section:
First, Open your GA4 account. Then go to the configure section. You can find these in the sidebar under “Configure“. You must select the Custom Definition option and go to the Custom Dimensions page.
If you want to create a metric instead of a dimension, click the ‘Custom metrics’ button next to ‘Custom dimensions’.
2. Choose the event parameter:
Click the “Create custom dimension” button in the upper right corner. A white box will appear on the side of the screen for you to fill in some content.

I suggest you can start by filling out the box below. “Event parameters” as this dropdown will show you all the available native event parameters you have.
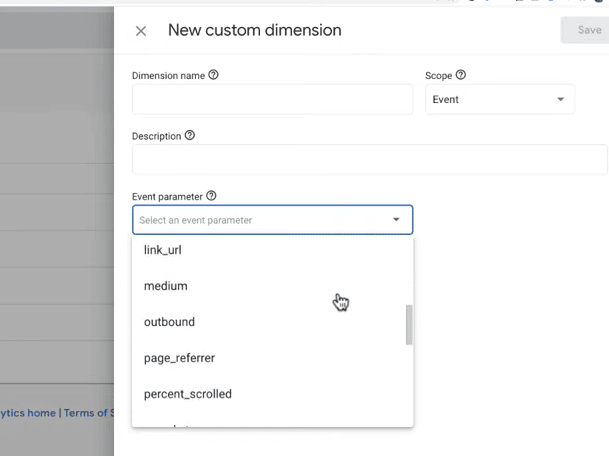
When using native dimensions just select one of the options in the drop-down list. When using custom dimensions, you’ll need to specify by typing out whatever it is.
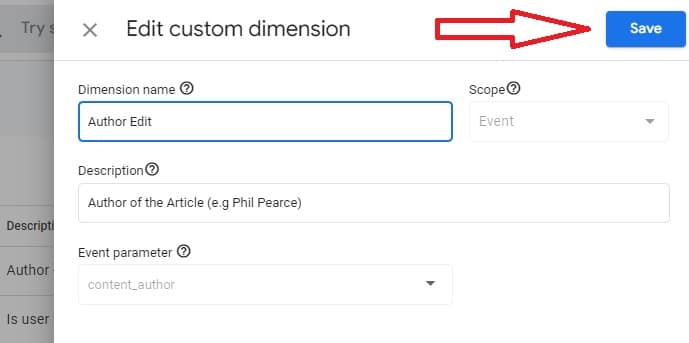
3. Give a name and a description
Next, we need to give the dimension a name and a short description. To avoid unnecessary confusion, I recommend preferably using the same name as the parameter under the description name.
This way, it’s easy to identify, so you’ll immediately know what that custom dimension is. Before we move on, let’s quickly mention “scope.” You need to select an appropriate area, in this case, an event.
Note that this is not the same as Scope in Universal Analytics; your choice is User, Session, or Hit. In GA4, you can choose between the event or user area.
Next, you can click on the Description field, where you can briefly describe the purpose of the custom dimension. All you need is a brief description explaining the purpose of this dimension.
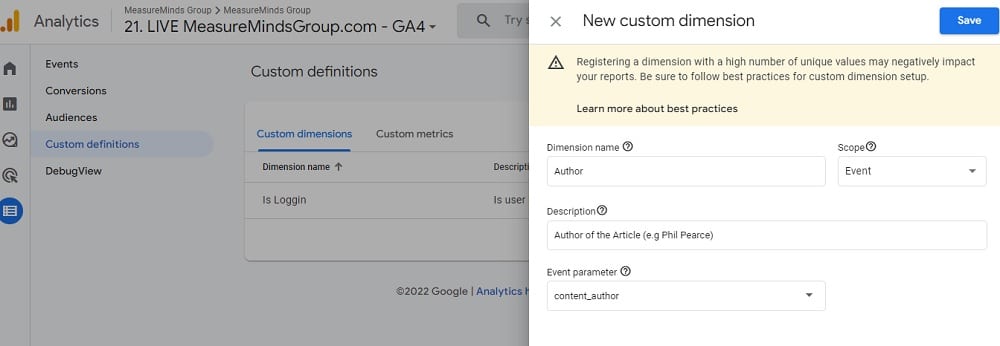
4. Don’t forget to save!
Now is the time for the most obvious and final step; save your dimensions. Always click the blue “Save” button in the upper right part. You’ll see this new dimension in its list. You have officially recorded it on your property to use in the reporting and exploration interface.
Your GA4 custom dimension is now ready to use!
How to edit a custom dimension in GA4
To edit custom dimensions, You need to follow this step-by-step guide:
Step-1: Open the GA4 property and click on configure.

Step-2: Click on custom definitions.
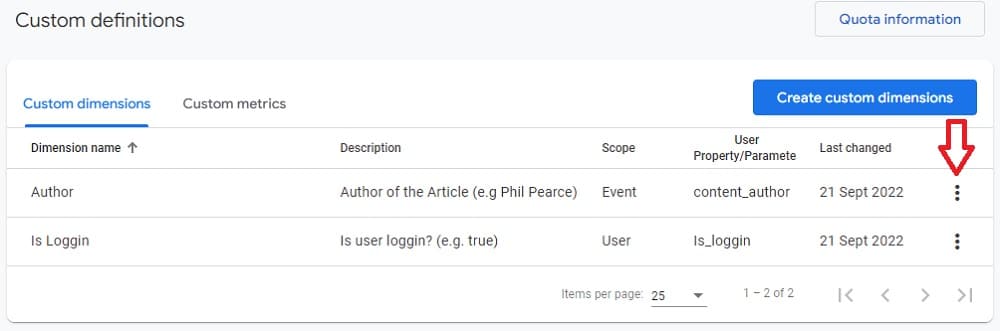
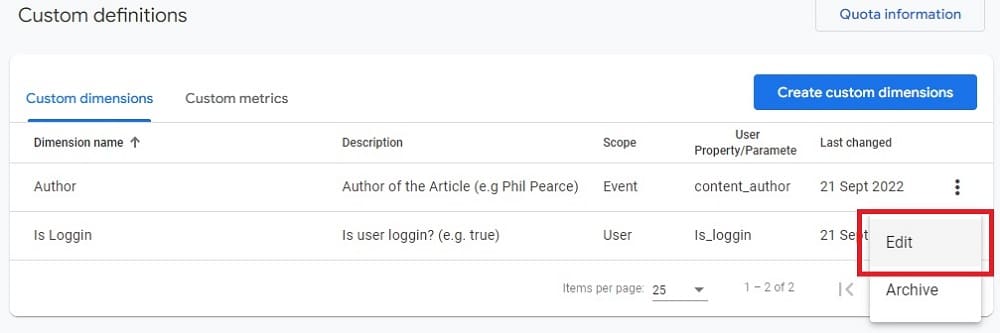
Step-3: Click on the vertical three dots at the end of each of the custom dimensions.
Step-4: Click on the edit option.
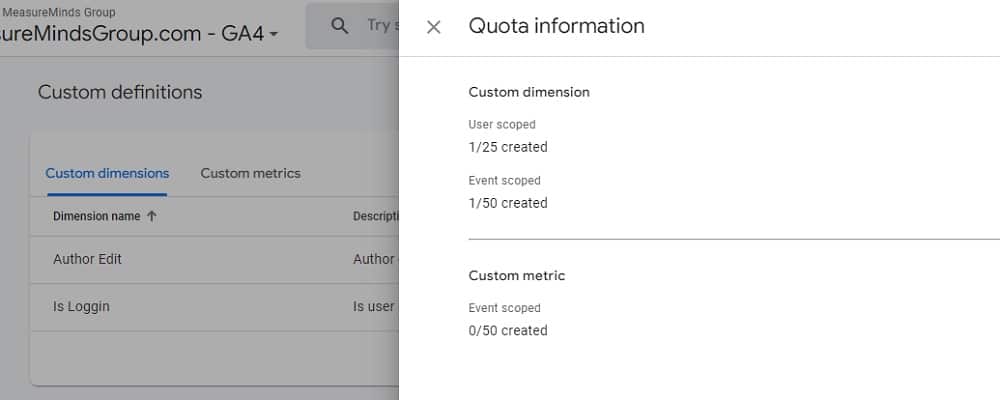
Quota information for custom dimensions
In GA4, you can create up to 25 user-scoped custom dimensions and up to 50 event-scoped custom dimensions per property. It is a limitation, but more than you could use in Universal Analytics.
Suppose you want to know the number of it you already have created and the number of it you still can make. You can see the info through the Quota information feature in GA4.
To get Quota information, You need to follow these step-by-step guide:

Step-2: Click on custom definitions.

Step-3: Click on quota information from the right side of the corner.

You can now see the number of custom dimensions you have created and the number you can still make.
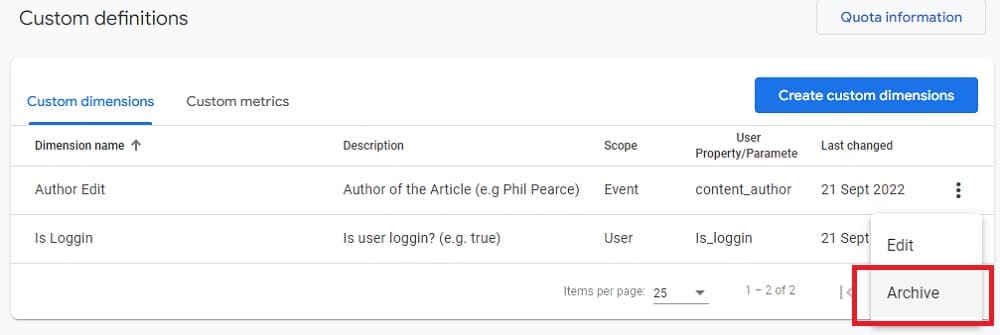
How to delete a custom dimension
In Google Analytics 4, you can make 25 user-scoped custom dimensions and 50 event-scoped custom dimensions per property. Once you reach the limit, you can’t make more. If you want to create a new one, you must delete the another.
To delete an unusable one, You need to follow these step-by-step guide:
Step-1: Open the GA4 property and click on configure.
Step-2: Click on custom definitions.

Step-3: Click on the vertical three dots next to the custom dimensions you want to delete.
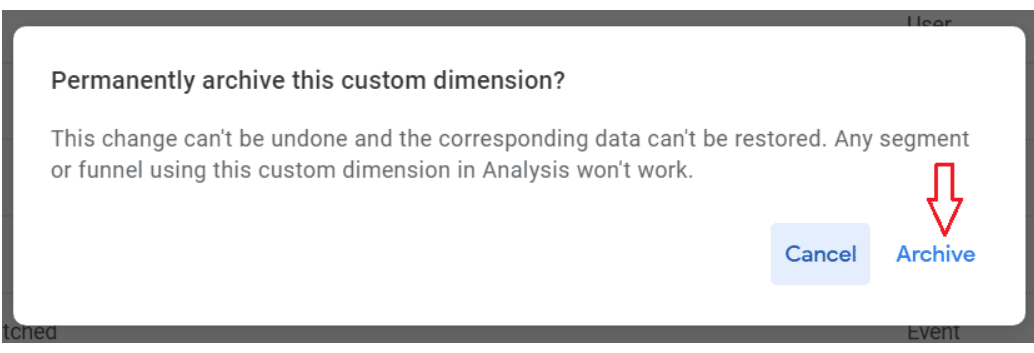
Step-4: Click on archive from the drop-down.
Conclusion:
That’s all there is to it! You now know how to set up custom dimensions in Google Analytics 4 and use them to track your website data. Thanks for reading this guide – we hope you find it helpful as you continue to grow your business online.
- Top 24 Google Analytics Chrome Extensions & Sheets Add-ons - 21/05/2026
- Best Consent Management Platforms (CMP) - 19/05/2026
- Google Signals and Consent Mode: What This GA4 Change Really Means - 23/04/2026