8 Google Tag Manager Best Practices: By Fred Pike

Here, Fred Pike talks about his top Google Tag Manager best practices that he’s built over his numerous years in analytics. Utilise these in your setup and you’ll be in a great position.
This article will focus on the ‘three Ds’. These are:
- Debugging – What can you add to the GTM container that will help you debug when things go wrong?
- Documenting – Documentation is the hidden strength of GTM vs GA4. It can be added to everything in GTM.
- Discerning – The whole purpose of the work you do with the GTM container is to understand what’s going on within the container.
This is a write-up of Fred Pike’s talk that he gave at GTM4ward. Here you can find his slides. You can also watch the recording of his talk below:
If you want the recording of Fred’s great talk and others from GTM4ward, you can purchase them for a small fee.
Here are Fred’s Google Tag Manager best practices!
- Always include a Version ID
- Provide proper documentation about your containers
- Utilise the hit_timestamp
- Add a tag name parameter
- Name your tags wisely!
- Add the Google Click ID to tag event settings
- Don’t use click_text triggers
- Use a dataLayer push for form submissions
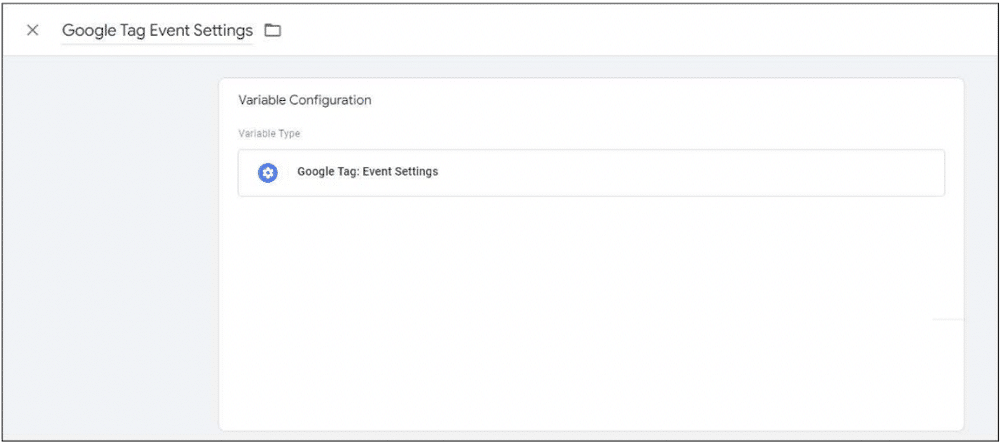
1. Always include a Version ID
One of the first things we can do in the new Google Tag Event Settings is add a new container and version ID. Let’s see what happens when you go live with these.
For this example, we’ll look at the GoPro website. If we press F12 on the site, we can see some of the GA4 events present on the site.
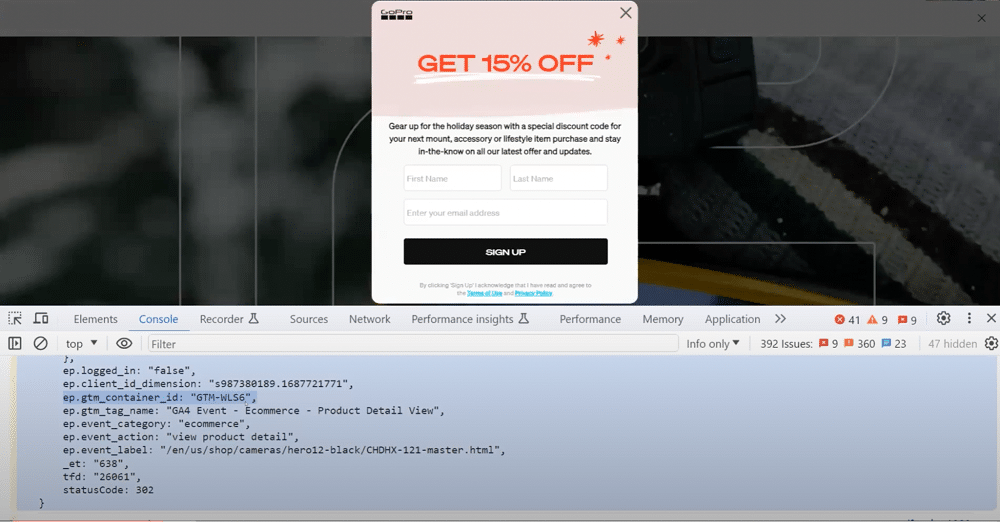
In the GA4 event, there is a parameter and a container ID of ‘GTM-WlS6’. This is great but doesn’t include the version ID. The container ID is useful because when working with lots of containers, you can track down the one you need easily.
This is only part of the issue, though. The really important factor is not the container itself but the version. Spotting changes and trends over time can be essential for addressing current problems.
Now, let’s look at an example of a site that does have a version ID.
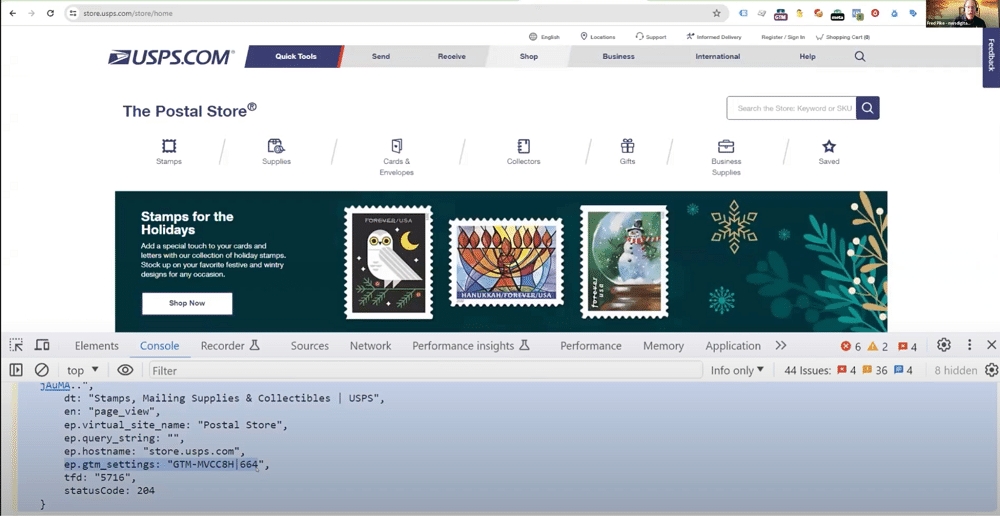
You’ll see that this time we have ‘gtm_settings’, which contains our container ID. This is version 664. If we’re trying to find a fault, we can go in and look at version 663. We can figure out the exact point that a change occurred and fix it.
Descriptive labelling is always useful. You’ll notice that the website doesn’t specifically label version ID anywhere. A user might miss this important feature.
When you set this up within your own GTM container, here are some of the ‘dos and don’ts’ you should consider.
- DO – Change the name. A simple ‘gtm_info’ should suffice.
- DO – Include the version ID.
- DON’T – Break into two parameters – Container ID and version ID are essentially two bits of the same information.
2. Provide proper documentation about your containers
Good documentation will always help with managing GTM IDs. When you publish, you need information about what you have published. There are two places you can put this. Firstly, you might choose the container name. Or, you could fill out the description section.
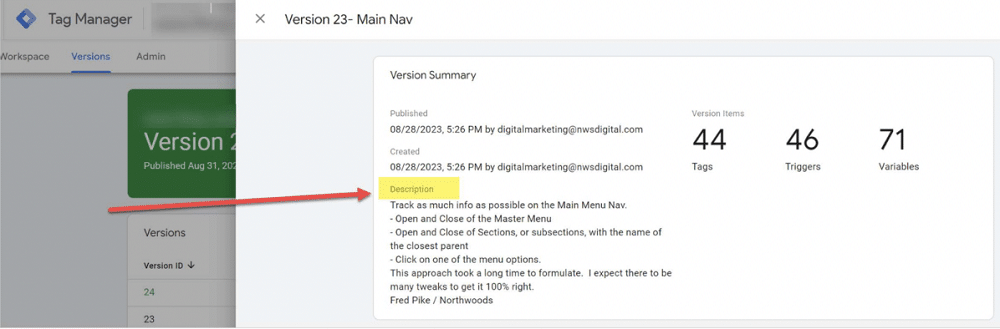
By avoiding this step, you’re not helping yourself. You can go in and find out about a container, but this is a cognitive load on users who look at your container in the future. So, do yourself and future users a favour and be descriptive.
3. Utilise the hit_timestamp
The hit_timestamp is added to each event in GA4. At this point, you might be thinking ‘This information is all available in BigQuery via the event_timestamp’. So, why do you need hit_timestamp?
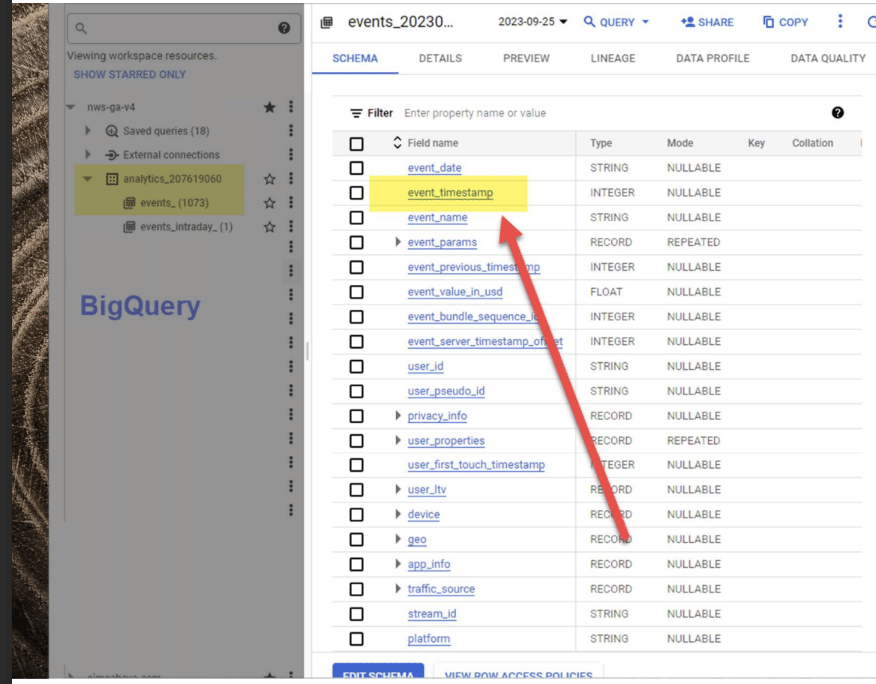
Partly, because the event_timestamp is not in a human-readable format. It only shows up when the hit is processed.
Alex Ignatenko wrote an interesting post on this topic. Hits from GA4 are not sent one by one but in batches. The event_timestamp records the batch sending time not the event time.
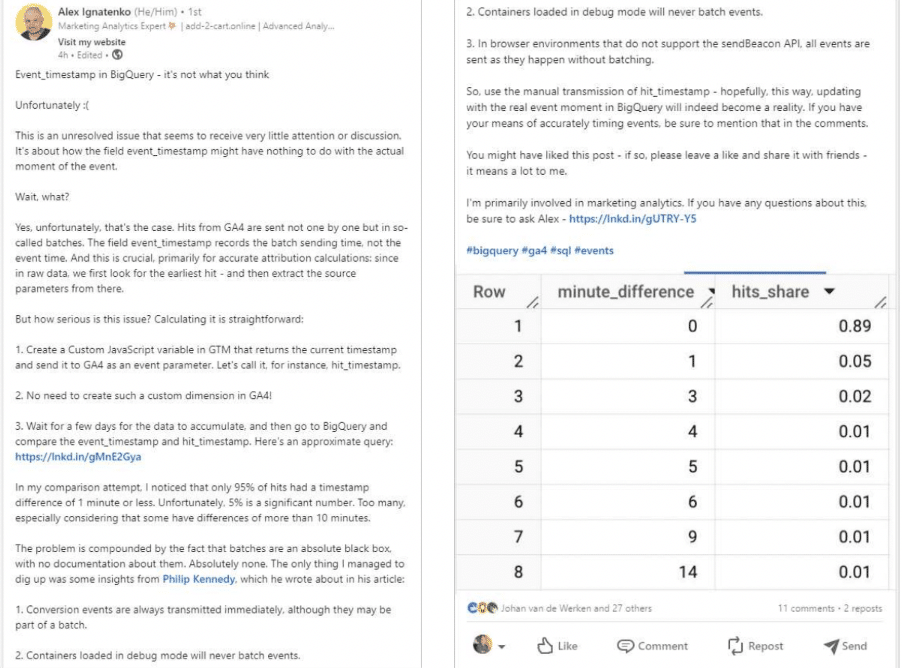
To sum this up, make sure you insert the hit_timestamp within the GA event settings and not the Google Tag. Above all don’t make this into a custom dimension. If you have more than 500 values for one parameter, you potentially introduce a cardinality issue.
Putting these points into action
Let’s put the points we’ve discussed so far into action. The image below shows some of the elements that show up on our site. This includes a GTM container and version ID, and the human-readable hit timestamp.
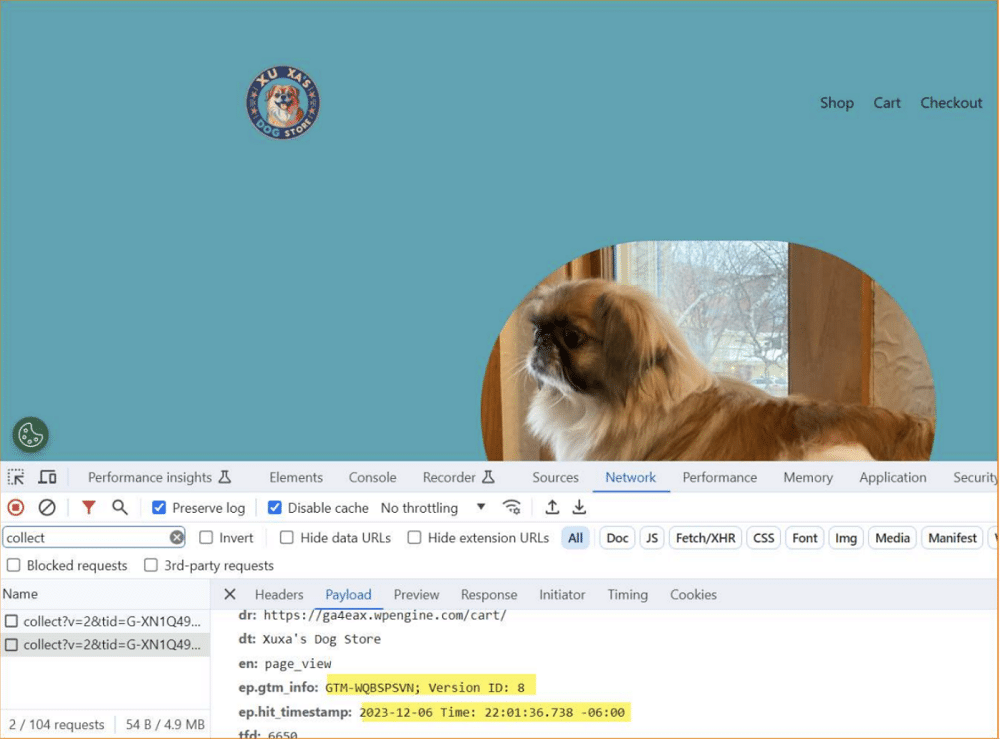
In terms of documentation, we’ve added a note giving more details about our custom dimension. We’ve added a link to the blog post where we obtained the dimension, as well as information about why we’re using it.

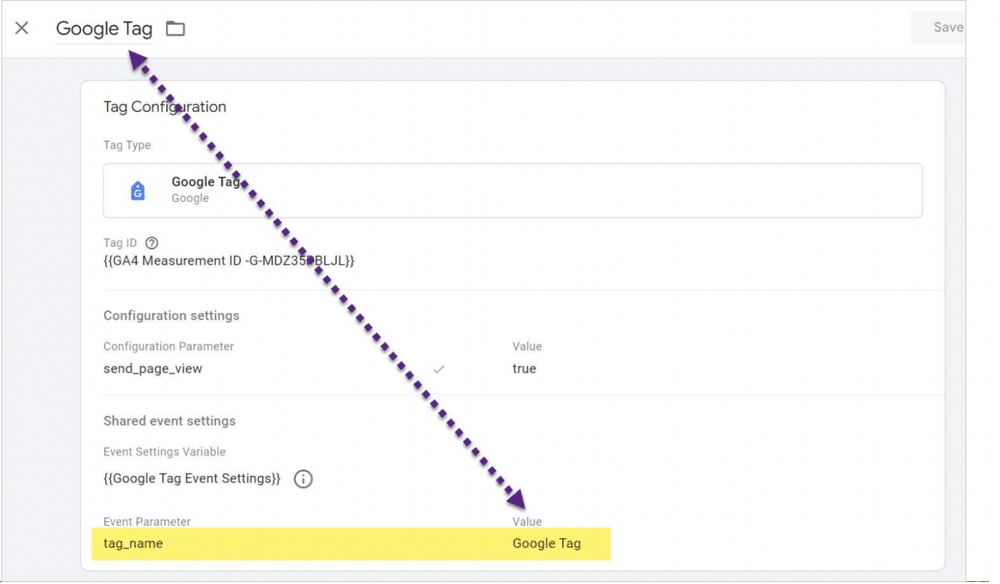
4. Add a tag name parameter
Out of all our Google Tag Manager best practices, this is probably number one. Have a custom parameter ‘tag_name’ and copy the name of your tag into the value field. The reason is that in GA4, there are so many event sources. An event could come from
- GTAG
- GTM
- Audiences
- “Modify events” in GA4 admin
- “Add events” in GA4 admin
- Measurement protocol
When you’re taking over a GA4 account and trying and can’t find the source of an event it can be very frustrating. Help yourself out; adding a tag name will make a big difference.
You can see from the below image that GoPro does a good job of this.
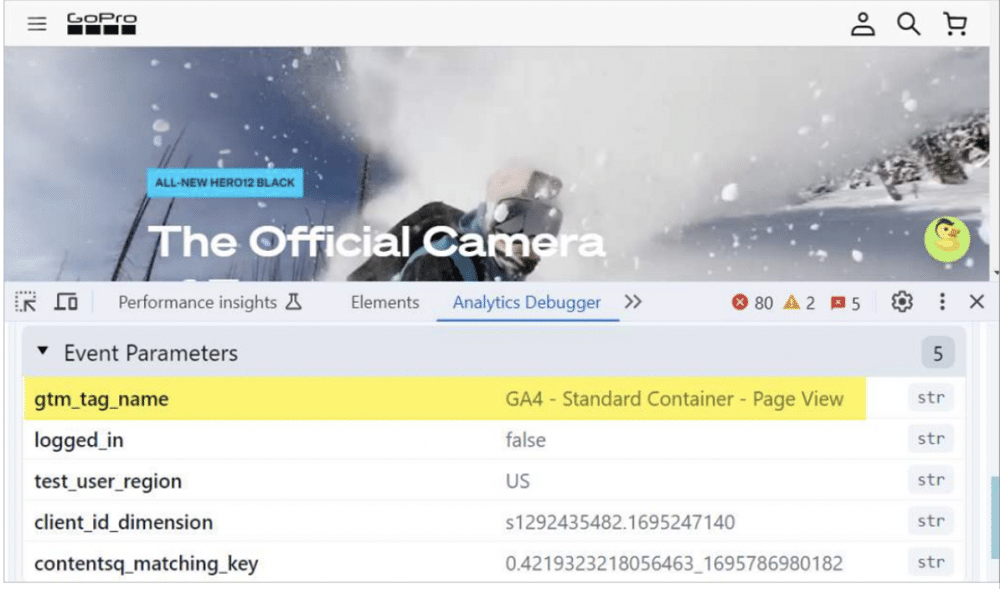
Once you’ve chosen your parameter add it to all events in GTM. You should also add this in the GA4 admin if you’re adding or modifying events (seen below).
Note: The only downside of this approach, is that a user must remember to do this manually each time.
Another important factor is the name that you choose for your tag. It’s easy to get distracted by the vast range of GTM features and forget this point. Sensible naming is essential, though, if you want to get ahead in GTM.
The below image shows a tag named ‘Bottom Nav Tag’. Unfortunately, the name has nothing to do with the ‘menu_click’ event. It will take a lot of mental processing to figure out what this tag actually does.
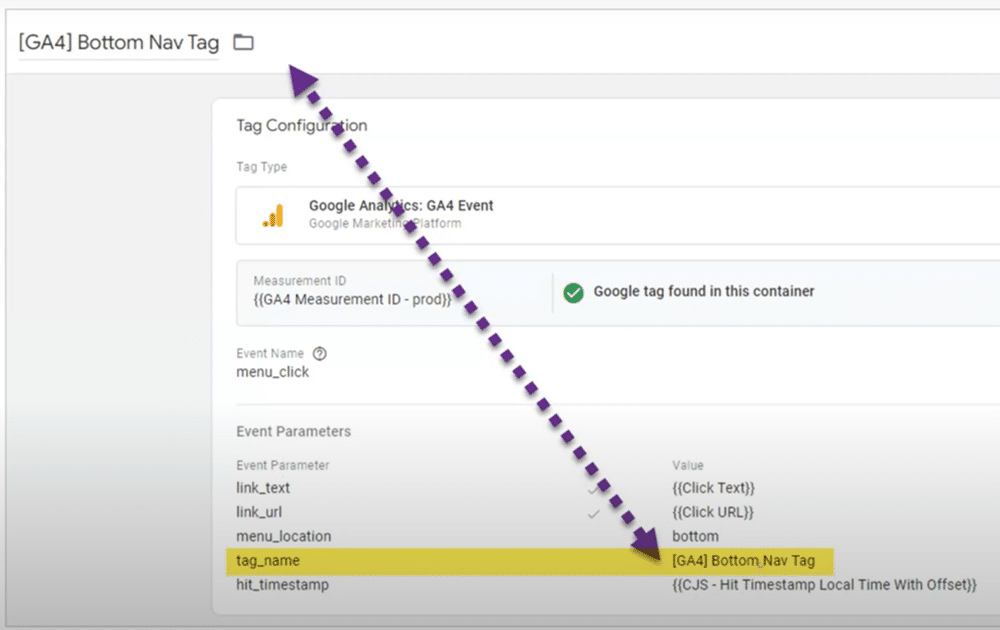
Do yourself a favour and include a portion of the event name within the name of your tag. There’ll be less cognitive load and less work for you in the future.
It’s important to think about data visualization in terms of GTM tag naming. Below are some examples of GTM containers that we took over. Every tag started off in the same way–the company name, followed by ‘GA4 event’.
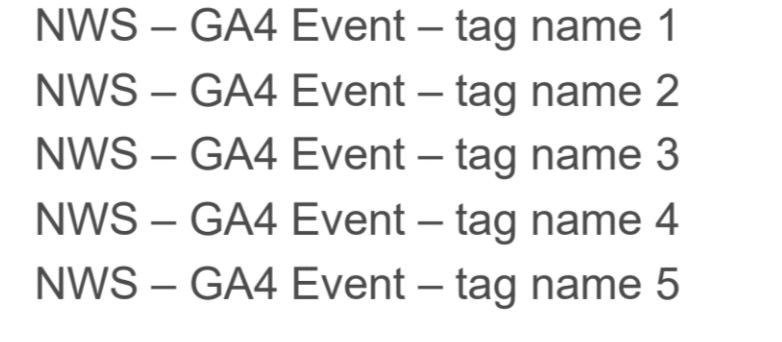
How much of this is information and how much is noise? There is a lot of noise here.
That’s why you should think in terms of data visualization. A key goal of visualization is to reduce cognitive load. In this instance (seen below), we simplified the naming. We removed the company name and ‘event’.
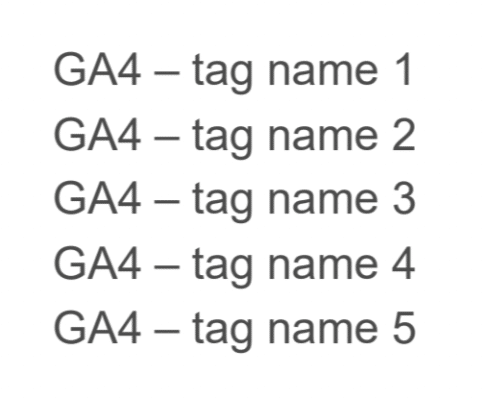
The label ‘GA event’ was useful in Universal Analytics. There were many different types of UA: ‘page views, transactions, e-commerce, etc. In GA4, though, everything is an event–there’s no need to include the word event in the ‘name’.
Again, give your brain a break, and aim for a sensible naming convention.
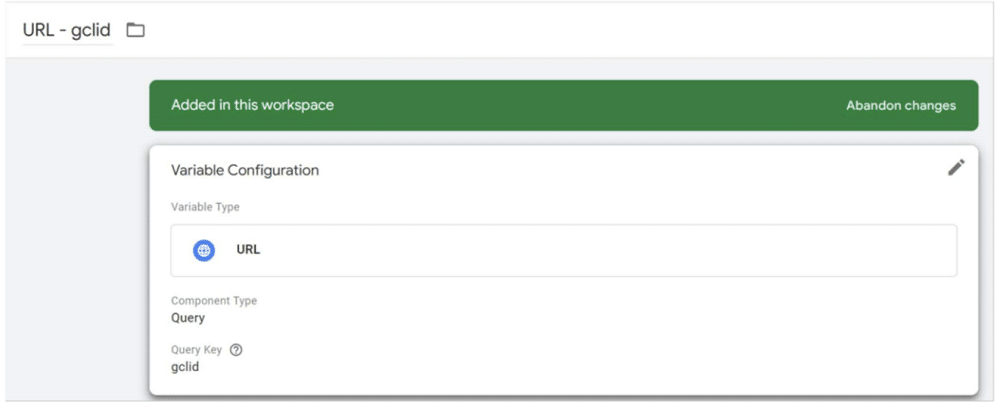
6. Add the Google Click ID to tag event settings
Grab the custom Google Click ID and store it within the Google Tag event settings. You should set this up as a query (an example is shown below). The reason for this approach is that it is extremely useful for recording offline conversions.
It’s always useful to obtain the client ID. The below image shows another example from the GoPro website. You’ll notice that the client ID section begins with an ‘s’. This ensures that it is treated as a string by BigQuery. If you don’t follow this step, BQ will treat the ID as an integer and only record the first five numbers.
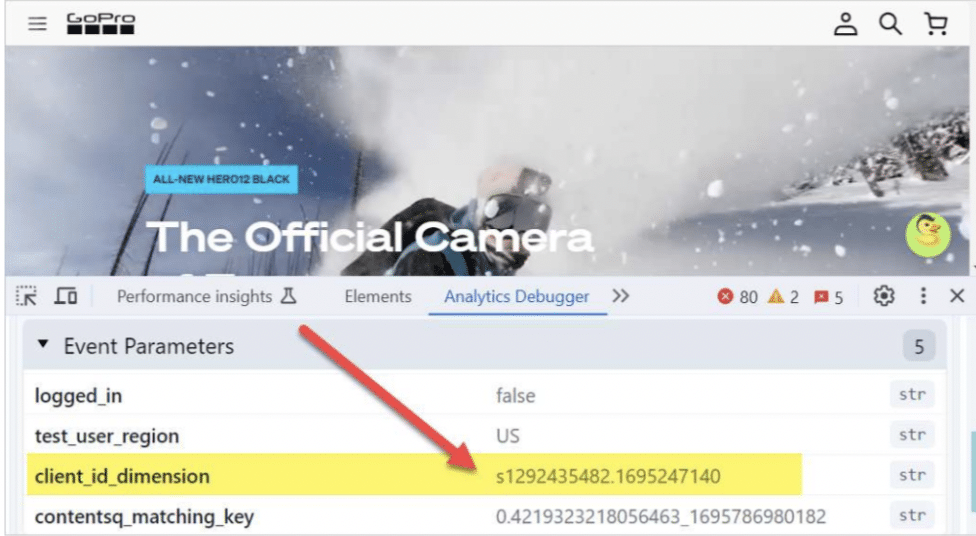
Alterntively, you could add a period at the end of your ID to accomplish the same effect.

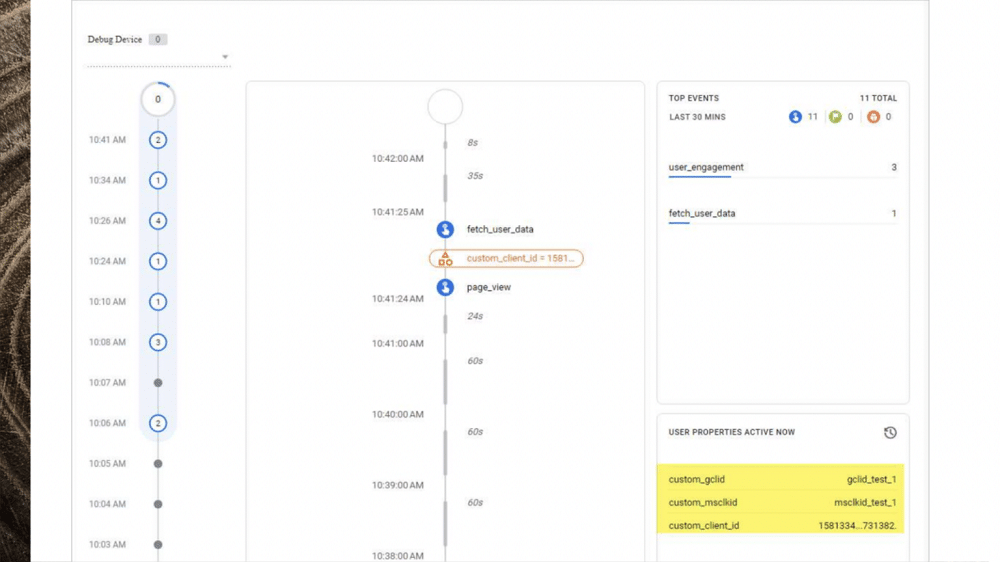
If you set this up correctly the custom GCLID, the MS click ID, and the custom client ID will all show up as user properties.
7. Don’t use click_text triggers
Over the years lots of people have set up triggers based on click_text. Make no mistake, this is a bad idea. To demonstrate why, let’s head back over to our demo site.
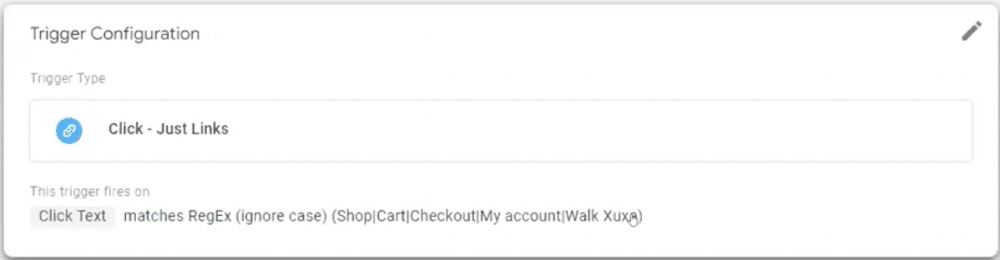
You’ll notice that when we visit the ‘shop’ page, we have both a primary_nav_click and a primary_nav_click based on a click_text.

We’re using RegEx for our click_text to capture all those clicks.
Whilst, this works you might encounter a few issues with this approach. Firstly, it’s very common for click_text to change. You might alter a CTA or button.
Alternatively, a user might be translating the page. As you can see in the example below ‘Shop’ is now ‘Comercio’.
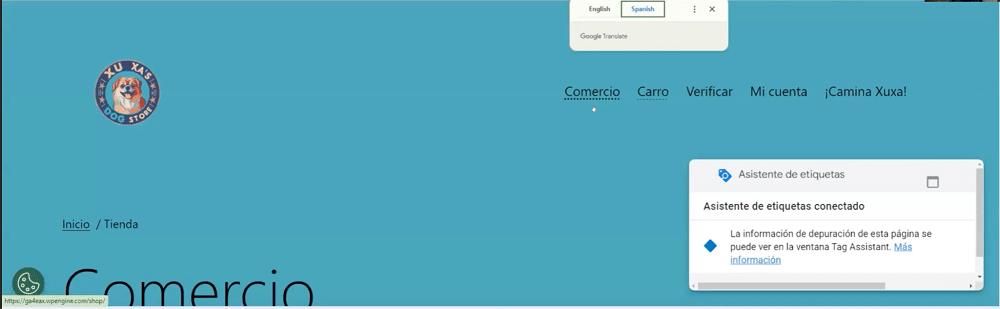
In this scenario, the primary nav clicked worked, but the RegEx didn’t work. This is because ‘comercio’ doesn’t match the original text. A better approach is to use a CSS selector. This would mean that anything on the primary menu container is captured.
So, unless you have no other option, it’s almost always best to stay away from click_text.
8. Use a dataLayer push for form submissions
There are three ways you can handle form submissions:
- A ‘thank you’ page view after the form submission – With this approach, you don’t know which form a user selected. Errors can also occur before a user reaches the thank you page.
- Element visibility (and dummy test tag) – This could be included in the wrong area of the page.
- A dataLayer push – This could be the best approach. You have full control and there is less chance of error. The push occurs when the form passes all verifications. This means that the email, name, and other factors will all be correct.
Let’s look at the DataLayer approach in more detail from our example (shown below). It has to have a ‘form_submitted’ event, a specific form_name, and a form ID. Thanks to the dataLayer push, we can grab all this information in GTM.

This is an easy process to explain to a developer and shouldn’t be difficult to implement. As long as you have an event, you can give the parameters any name you’d like.
Final thoughts
For the best experience, always use dev tools when you’re cruising around different websites. Look at what others are doing: what they’re tracking and how they’re tracking it. Tools like dataLayer Inspector+ and Analytics Debugger are some examples of essential expert-recommended GTM tools.
If you’re a developer and looking for more GTM tips, you can download our free GTM developer guide.
About Fred Pike
Fred Pike is the Founder of NorthWoods a Digital agency & Design/Build shop in Milwaukee Wisconsin – where he leads the GA4 & GTM team. Fred is PASSIONATE about GA4 & GTM and loves to build GREAT implementations, but he also loves to teach students to be… as GREAT as he is.

- Top 24 Google Analytics Chrome Extensions & Sheets Add-ons - 21/05/2026
- Best Consent Management Platforms (CMP) - 19/05/2026
- Google Signals and Consent Mode: What This GA4 Change Really Means - 23/04/2026