How to Use Google Analytics 4 (GA4) for Video Tracking
Wondering about Google Analytics 4 video tracking? The good news is that GA4 has features to help you. If you’re looking to go the extra mile, though, you’ll need to take a few more steps. Today, we’ll explore some of GA4’s inbuilt features. We’ll also look at how you can link with GTM to get even more data.
What video tracking features are available in GA4?
GA4 video tracking is enabled through ‘enhanced measurement’. This is a form of event tracking that automatically tracks certain events.
In Universal Analytics, GA would only track page_view events by default. If you wanted more detailed information about user interactions, you’d need to add your own event tracking. Enhanced measurement ensures you’re getting much more data out of the box.
Enhanced measurement tracks the following events:
- Page view events
- Scroll events
- Outbound clicks
- Site search
- Video engagement events
As you’ve probably guessed, we’ll be focusing on the last option. GA4 automatically tracks three video engagement events: video_start, video_progress, and video_complete.
These do pretty much what’s said on the tin. The ‘video_start’ event is fired the moment a user starts watching a video. The ‘video_progress’ event tells you how far a user has progressed through a video (20%, 70%, etc). Lastly, the ‘video_complete’ event, you guessed it, is triggered when a user finishes a video.
Alongside these events, enhanced measurement also tracks some parameters automatically. These help provide additional context when tracking user interaction. These parameters are:
- video_current_time: Tells you the timestamp of a user’s current position when viewing a video.
- video_duration: The overall duration of a video measured in seconds.
- video_percent: The overall threshold of the video.
- video_provider: Information relating to the source of the video.
- video_title: The title of the video.
- video_URL: The Video’s URL.
- visible: Tells you whether the player was on screen when the viewer watched the video. If visible, ‘1’ will be displayed in reports.
Of course, to make use of these features, you first need to enable enhanced measurement.
Enabling enhanced measurement
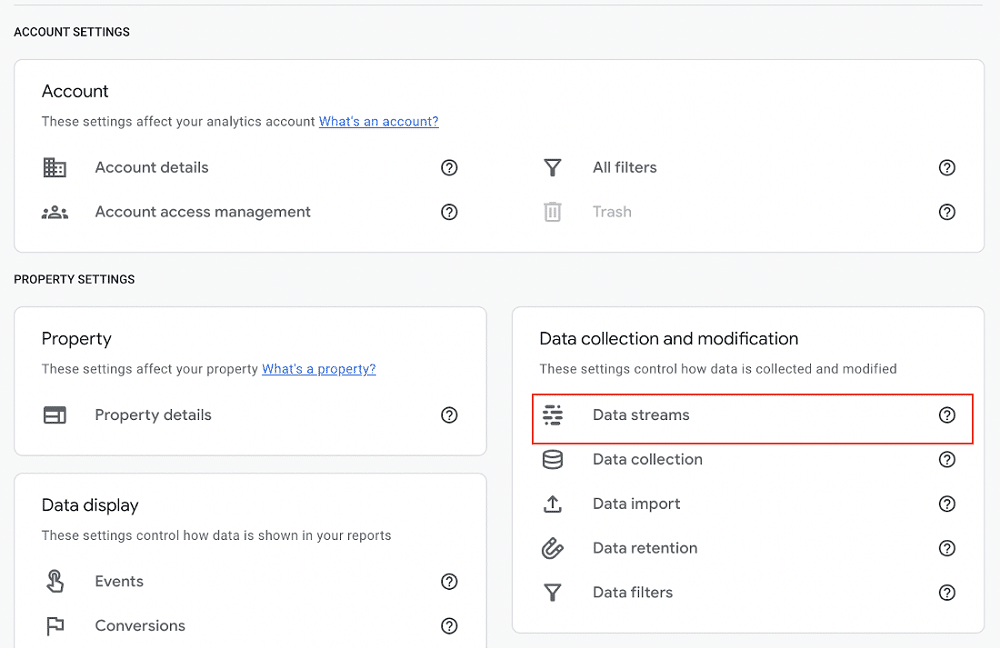
Luckily, enabling enhanced measurement in GA4 is simple. Just head to your Admin panel and then choose ‘Data streams.’ This can be found on the left of your screen beneath ‘Data collection and modification’.
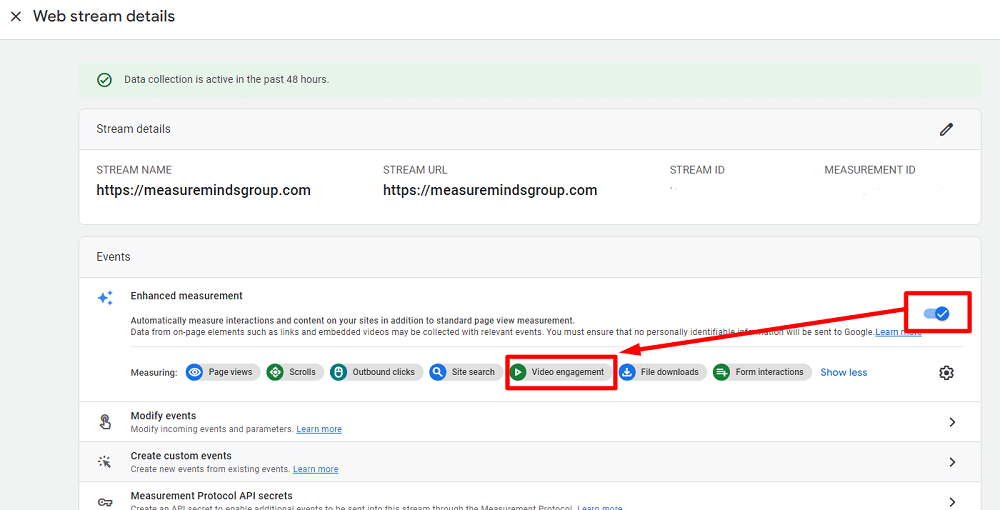
Next, select the data stream of your website. The following page should show a list of options relating to your website. Look for the ‘Events’ panel and ‘Enhanced measurement’. There, you should see a toggle button, click the button, and enhanced measurement will be enabled.
Once an enhanced measurement is enabled, you’ll notice a list showing all the events being tracked. You should spot ‘Video engagement’ in this list.
By clicking the cog icon, you can filter by specific events.
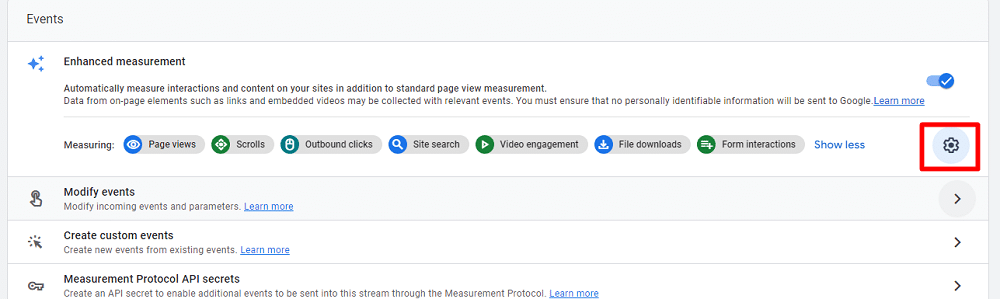
For example, if you’re only interested in receiving video engagement events, you could set a filter.
Enabling the JavaScript API
To ensure that video event data is flowing into your GA4 reports, you first need to enable the JavaScript API. To do so, go to the iFrame of your embedded YouTube video and add the attribute’enablejsapi=”true’’.
In practice, this looks similar to the example below.
<iframe src=”https://www.youtube.com/embed/GhBLKAQfzhFr” width=”426″ height=”240″ title=”YouTube video player” enablejsapi=”true” frameborder=”0″ allow=”accelerometer; clipboard-write; encrypted-media; picture-in-picture” allowfullscreen></iframe>
And there you have it! Enhanced Measurement should be picking up your video event data.
Using the GTM trigger with GA4
Sadly, though, the earlier method isn’t perfect. There have been numerous reports of GA4 failing to accurately track video event data. If you’re relying on enhanced measurement, you might not be getting the full picture.
So, what’s the alternative? Let’s look at some advanced GA4 tips to help you.
One method is using the Google Tag Manager (GTM) trigger with GA4 to track event data. First things first, if you’re going down this route, you must disable Enhanced Measurement video tracking. Otherwise, you’ll end up with duplicate data within your reports.
We do have a guide dedicated to video tracking with Google Tag Manager which delves into some advanced features as well. But if you’re looking for a basic setup we will show you here.
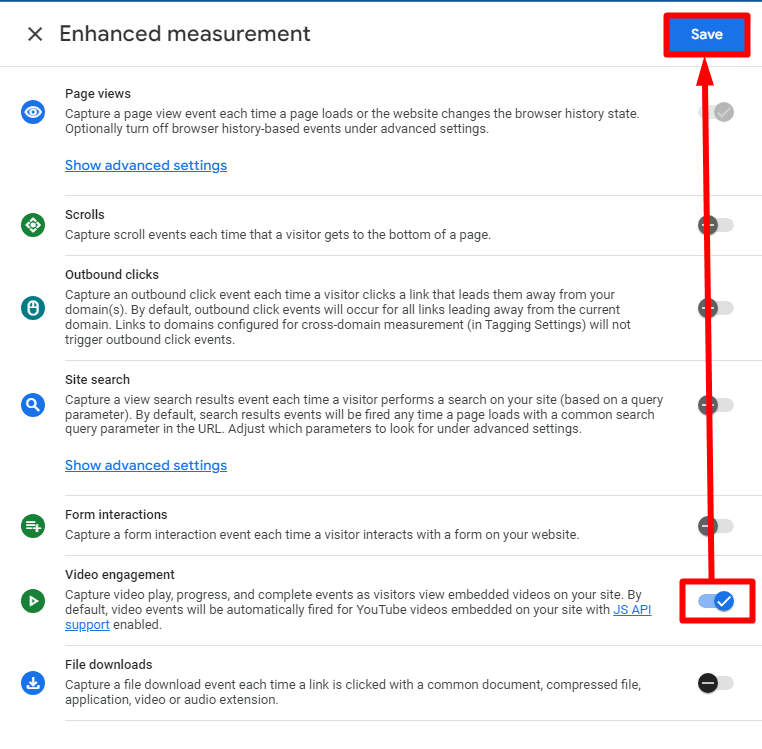
To disable video tracking, simply retrace your steps from Ealier. From the Enhanced Measurement window, click the gear icon, and remove video engagement from the list.
Before you begin, you should also make sure that you’ve linked your GTM account with GA4. If you’ve not yet taken those steps, Google has created a handy guide to help you.
Create a trigger
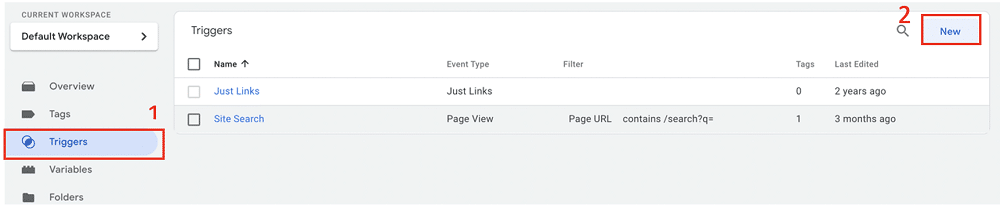
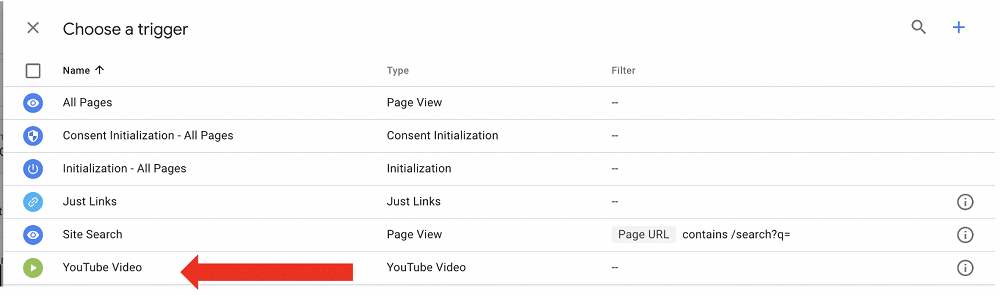
The first step is creating a trigger to fire when a user engages with your video. Head over to GTM, choose ‘Triggers,’ and then ‘New.’
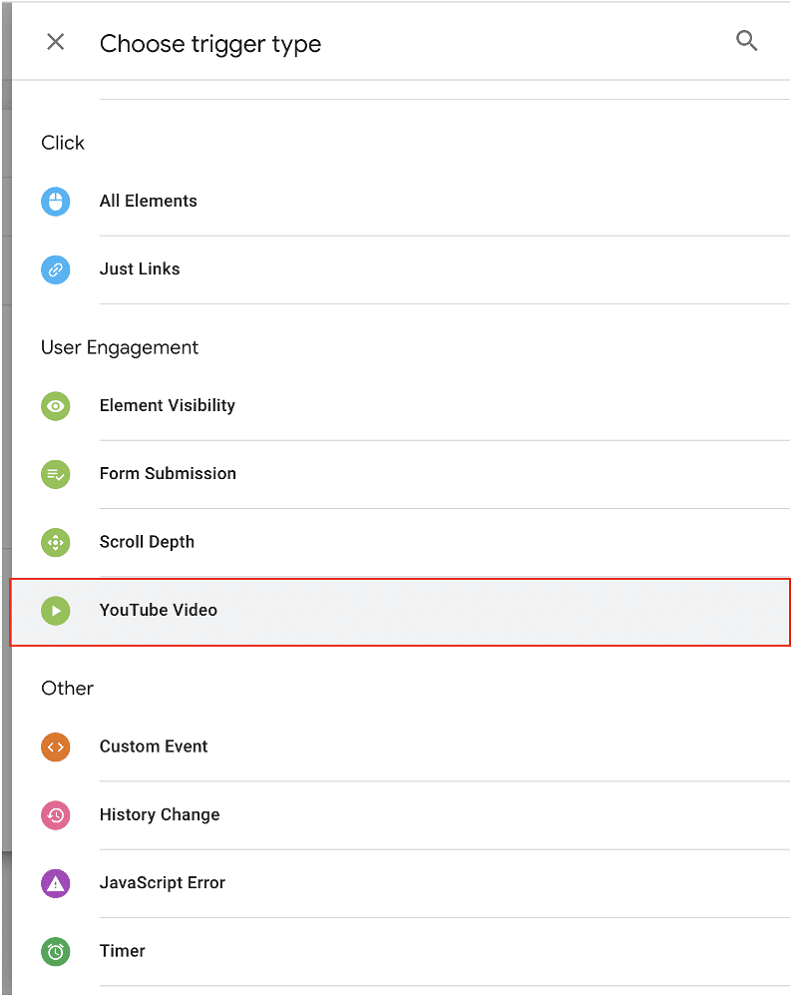
Next, scroll down the list until you see ‘User Engagement.’ Choose ‘YouTube Video’ from this section.
Now, you can configure your tag. The tag configuration screen contains multiple options to help you get the data you need.
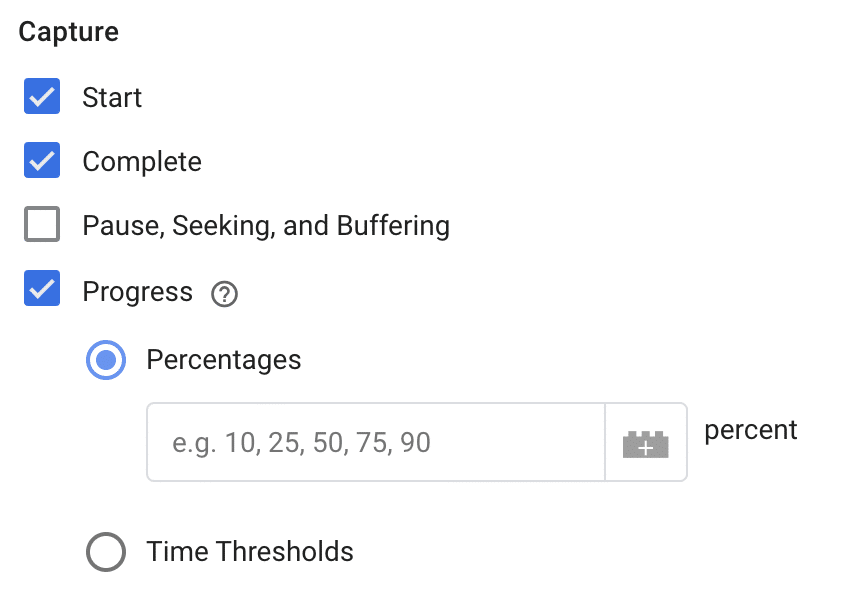
For the purposes of this tag, you only really need to focus on the ‘Capture’ section. Unsurprisingly, this allows you to specify the data you want to gather from user engagement.
You have the following options:
- Start – When a user starts a video.
- Complete – When a user finishes a video.
- Pause, Seeking, and Buffering – When a user pauses a video or when the video suffers lag.
- Progress – View a user’s position in a video. You have two options here:
- Percentages – For this option, you can specify reporting thresholds. For example, you can choose to be notified when a user views 20% of a video, with further notifications at 40% and 70%.
- Time Thresholds – Alternatively, you can be notified when a viewer reaches a specific time in the video.
You can select as many options as you’d like for your tag. Once you’re happy with your selection, choose ‘Save’.
Enable video variables
Next, you need to enable all video-related variables within GTM. Choose ‘Variables’ and ‘Configure’. Next, scroll down the list until you spot ‘Videos’. Tick all the boxes within this section.
Create a GA4 tag
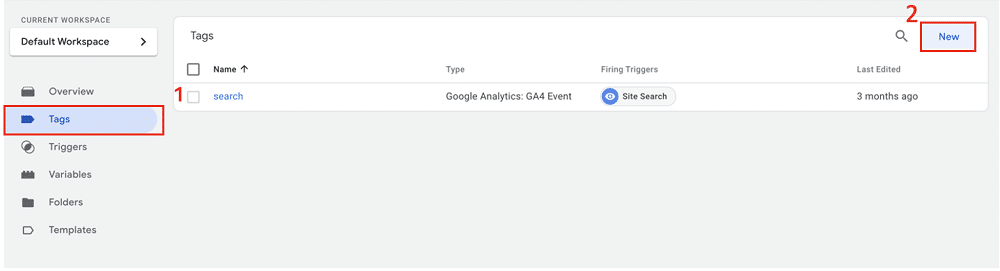
To create a tag, choose ‘Tags’ and then ‘New’.
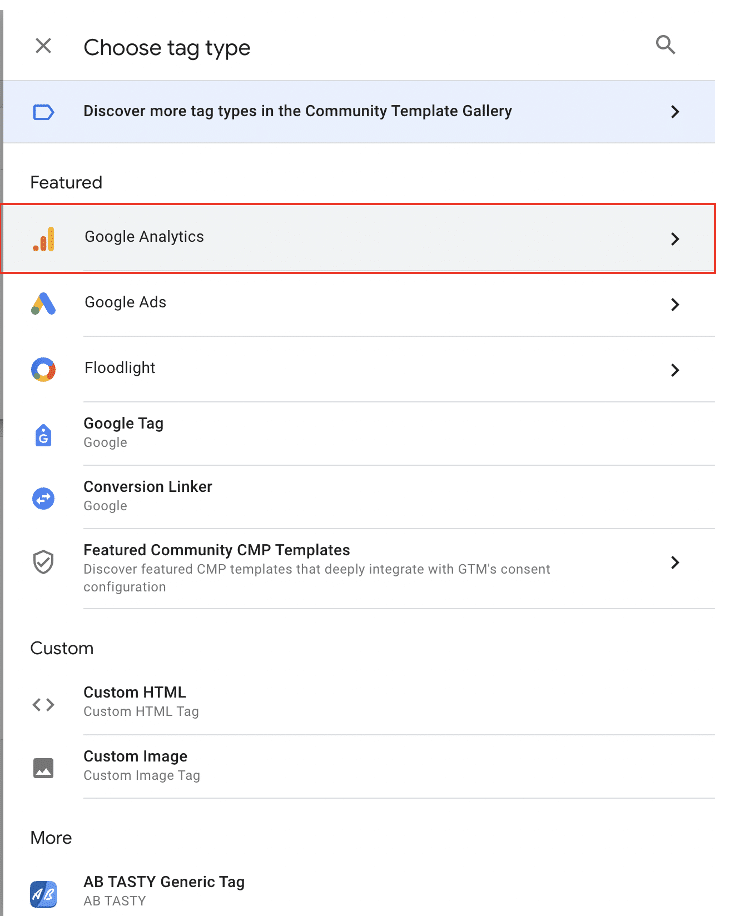
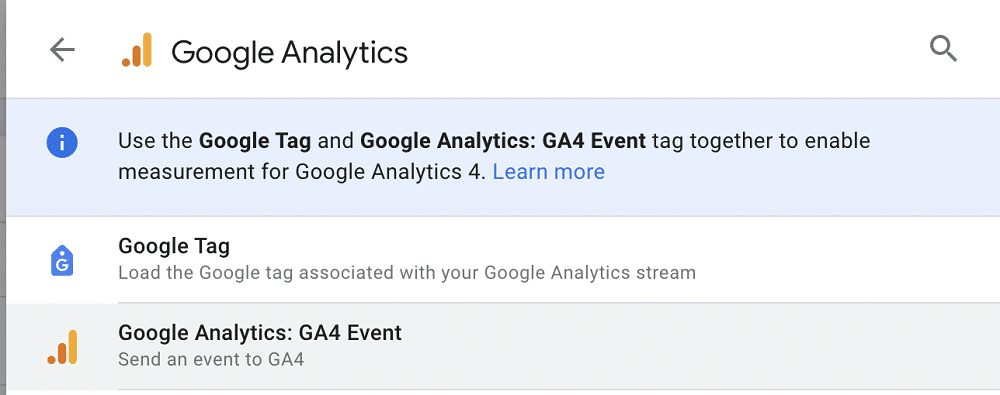
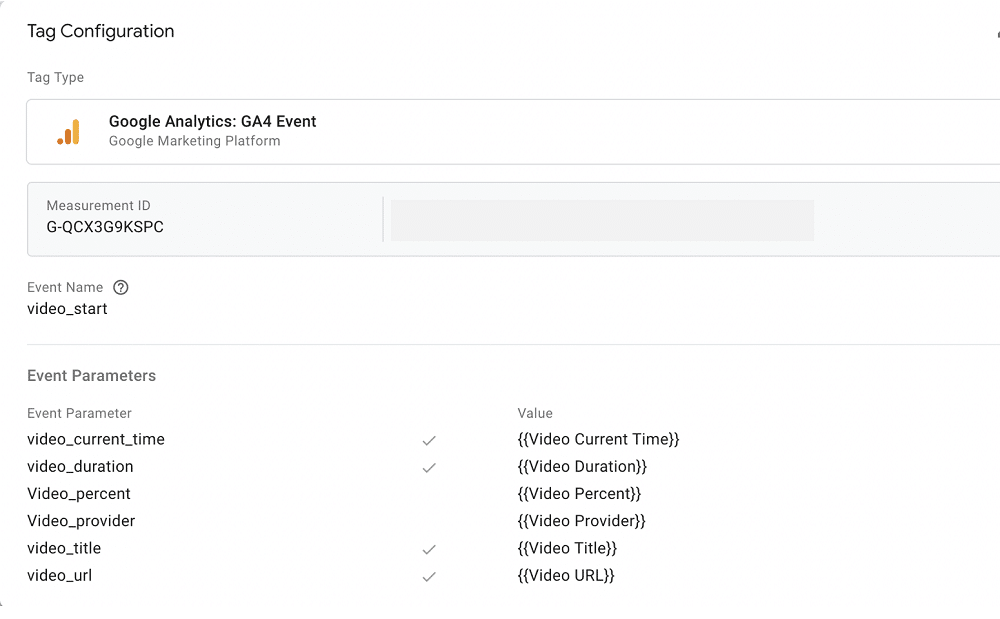
For ‘Tag Configuration’ choose ‘Google Analytics’, then ‘GA4 Event’.
The tag configuration page gives us lots of different options. Let’s look at each area individually.
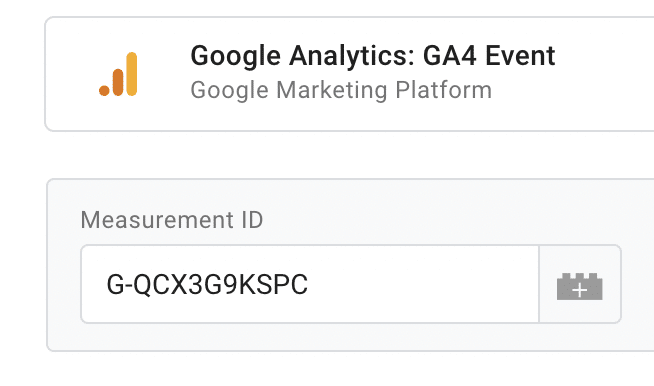
Firstly, you need to input your measurement ID. To do that, you’ll need to head back over to Google Analytics (Make sure you keep your GTM tab open). Return to ‘Admin’ and ‘Data Streams’. Choose the data stream of your property, on the right of the following menu, you’ll see your measurement ID.
Click the small square icon to the right of this to copy your ID.

Now, head back over to your GTM tab. In the box labeled ‘Measurement ID’ paste your ID.
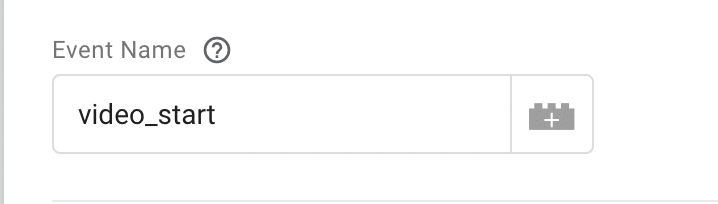
For the following section ‘Event Name’, enter one of the event types that we mentioned earlier. These were:
- video_start
- video_progress
- video_complete
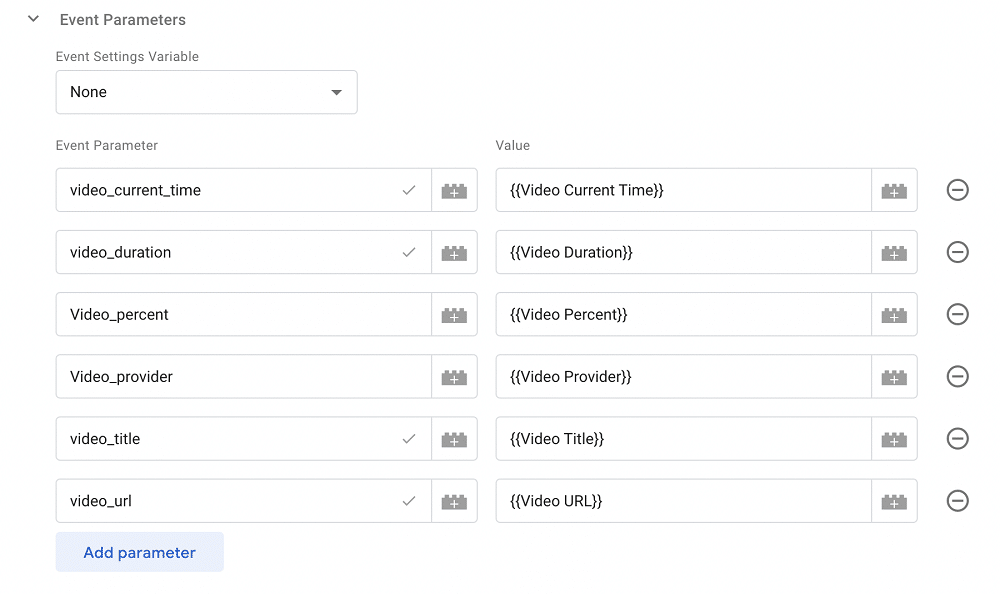
Under ‘Event Parameter’ you can add as many GA4 event parameters as you’d like. To add a new parameter, simply hit ‘Add parameter’. Again, as shown earlier, you have seven event parameters to choose from.
- video_current_time
- video_duration
- Video_percent
- Video_provider
- video_title
- video_url
- visible
The following sections ‘User Properties’, ‘More Settings’, and ‘Advanced Settings’, we’ll leave blank.
When you’re finished, you’re tag configuration should look similar to the image below.
Lastly, you need to click ‘Triggering’. You’ll see a list of all available triggers. Select the video trigger that we created earlier.
Now, name your tag and then click ‘Save’.
Testing
So, there you have it. You should now be collecting video data from your website. Of course, it’s still best to check that everything is working as it should be. To make sure, we can use a handy feature in GTM called ‘Preview and Debug Mode’.
From your GTM workspace, choose ‘Preview’ from the top right of your screen. You’ll be directed to a window that displays the URL of your website. From here, choose ‘Connect’.

A second tab will open, displaying your website. Navigate to a page that contains a YouTube Video. Interact with the video, then return to your GTM tab. If everything is configured properly, you should notice event data appearing within the timeline.
Select one of these events, and check whether your Analytics tag has fired. If so, great – everything is working properly! If not, you might need to retrace your steps and make sure you’ve followed our guide correctly.
The last stage will require a little bit of patience. You won’t see video data appearing within your GA4 reports for at least 24 hours.
Tracking self-hosted HTML5 videos
Instead of YouTube, you might choose to upload a video directly to your website. If that’s the case, the method’s we’ve explored above won’t work. Instead, you need to create a custom HTML tag within GTM to get the data you need.
Unfortunately, this step is quite tricky, and you might struggle without specialist help. We’ve briefly summarised the steps for tracking HTML5 below.
- Adding a custom JavaScript variable for pages containing HTML5 video.
- Creating a trigger that will fire when a video is loaded.
- Adding custom HTML tag
- Creating variables for each data point that you will be using.
Google Analytics or YouTube Analytics?
At this point you might be thinking ‘This is great, but couldn’t I save time by using YouTube Analytics?’.
YouTube’s own analytics software has plenty of features to help you track viewers interacting with your videos. After all, YouTube is also owned by Google. It can provide similar depth of data compared to GA4.
This includes access to reports relating to the demographic of your viewers, the sources of traffic and much more. But despite all these features, GA4 still has a place when it comes to video tracking on your site.
First and foremost, GA centralises your website data. You can find all the data that matters to you in one place. If you rely on YouTube analytics, you’d need to constantly swap sources to get the data you need.
Not only that, but YouTube cannot tell you what a user does after they view a video on your site. Do they sign up to your mailing list, view product information, or head to the ‘Contact Us’ page?
YouTube Analytics only gives you part of the picture. For indepth insights into user behavior, and to create an optimised user journey, you need GA4.
Ultimately the best solution is to use both GA4 and YouTube. This way, you get the best of both worlds. You gain better insights into website users, and in depth information about video viewers.
FAQ
Where can I view video event data in GA4?
To find your video event data, head to ‘Engagement’, and ‘Events’. This will provide you with an overview of all events on your website. From here, you can filter by video related events specifically to get the data you need.
How can I track YouTube link clicks?
You can track YouTube link clicks by adding UTM parameters to the end of your video’s URL (for example utm_source, utm_medium, etc).
How is video tracking different in GA4 compared to UA?
In Universal Analytics there was no out-of-the-box video tracking available. You’d have to set custom events to get the information you wanted. Luckily, in Google Analytics 4, we have ‘Enhanced Measurement’. This adds a number of video tracking features native to GA4.
Should I use enhanced measurement and GTM simultaneously?
It’s best to either use enhanced measurement or GTM. There’s a risk of duplicate data if you use both methods in tandem.
Why isn’t my GA4 tag sending data?
You need to wait at least 24 hours before video tracking data will start entering your reports. If, after 24 hours you still aren’t receiving data, you may need to do some tag troubleshooting.
Don’t miss out on video event data
Videos can be a key pillar of your content marketing. But you need the right data to guide your strategy. Luckily, getting the data you need in Google Analytics 4 is fairly easy. If you want to go down the simplest route, just head into admin settings and enable enhanced measurement.
But if you want to be sure of getting the most accurate data, you’ll need the help of GTM. As we’ve explored in this article, tracking YouTube data does involve a few steps. It is, however, relatively straightforward and shouldn’t be too complicated to configure.
Ultimately, whichever route you choose, you’ll get access to useful video event data. So, don’t miss out. Why not head into GTM or GA4 and set up video tracking?